It’s been a long time since I write a blog due to different projects I am working on. One of the interesting one is how can we more secure our containerized applications. There is K8S network policies and a lot of different CNIs to achieve same but is there a way to manage security from a single UI? Can I manage security policies on different virtual machines along with K8S pods running on different platforms all from a single place? Answer is yes by harnessing the power of Antrea with NSX. VMware introduces support for Antrea integration with NSX-T 3.2 and is adding more features with different release. In this blog series, I will focus on how to build a K8S platform from scratch, Install Antrea on a vanilla K8S (no managed platform) and integrate same with NSX. Link to other part of blogs –
Securing K8S Pods using Antrea with NSX – Part 2
Later on, will see how can we utilize NSX to provide more security to our applications. So, buckle your seatbelts as we head on this roller coaster ride.
Installing K8S
As this is a lab environment, we will be using 1 K8S controller node and 1 K8S worker node which is quite different from a production environment but it will suffice our needs. In diagram below, shows lab topology which we will be working with. This entire lab is setup on VMware Workstation running on Windows 11.
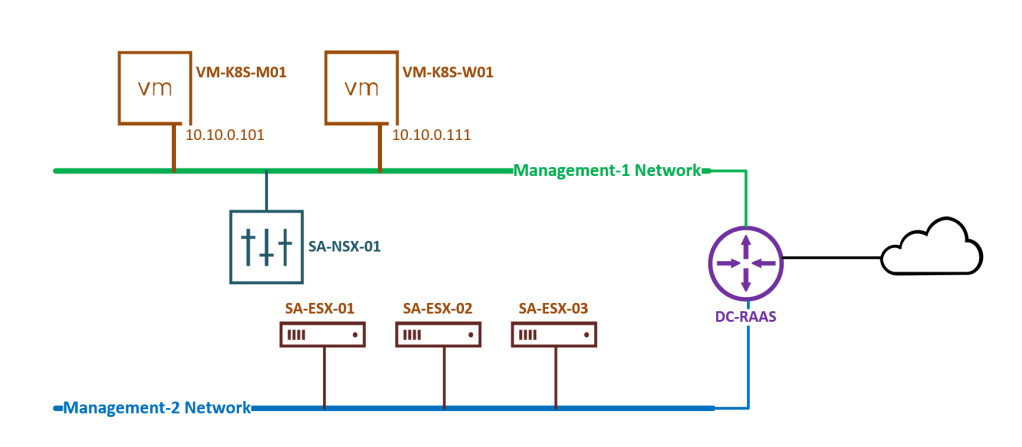
- VM-K8S-M01 – This is our K8S controller node which will host critical control functions such as API server, scheduler etc.
- VM-K8S-W01 – This is our K8S worker nodes which will be used to schedule application pods on.
- SA-ESX-01 – 03 – Three ESXi host running vSphere 7.0.3 to host vCenter server, Edge Nodes, application VMs etc.
- SA-NSX-01 – NSX Manager appliance
- DC-RAAS – Last but not least, critical router VM hosting different functions such as NTP, DNS, DHCP, Routing to internet etc.
Ok, lets’ dive into some good stuff now. Installing K8S. For this, I will be using CentOS as base OS to install K8S on top of it but similar steps can be used to install K8S on other flavour of linux as well.
installing binaries
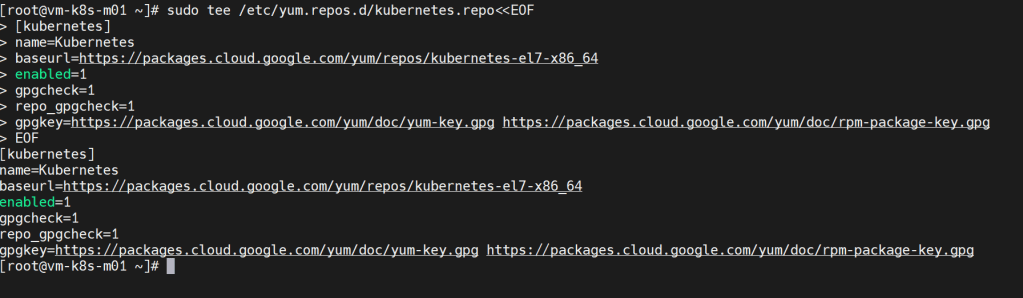
- Both VMs have internet access, using below comamnds to add K8S repository to install K8S packages.
sudo tee /etc/yum.repos.d/kubernetes.repo<<EOF
[kubernetes]
name=Kubernetes
baseurl=https://packages.cloud.google.com/yum/repos/kubernetes-el7-x86_64
enabled=1
gpgcheck=1
repo_gpgcheck=1
gpgkey=https://packages.cloud.google.com/yum/doc/yum-key.gpg https://packages.cloud.google.com/yum/doc/rpm-package-key.gpg
EOF
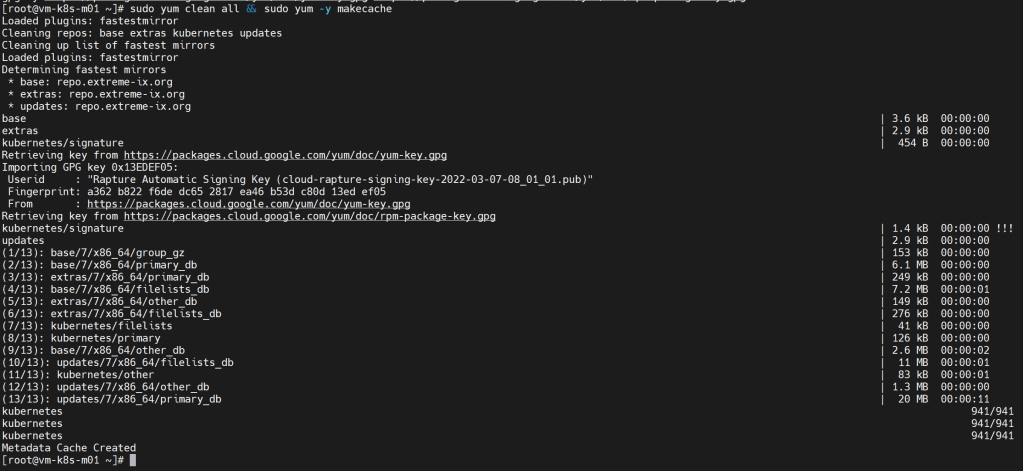
- Run the following commands to install the required packages.
sudo yum clean all && sudo yum -y makecache
sudo yum -y install epel-release vim git curl wget kubelet kubeadm kubectl --disableexcludes=kubernetes
- After the installation is complete, disable swap on filesystem using command
sudo swapoff -a.

- Next step is to install a container runtime engine. I have decided to go with containerd but other engine such as docker or CRI-O can be used as well. Complete following prerequisites as listed in K8S Documentation for successfull initialization of K8S cluster.
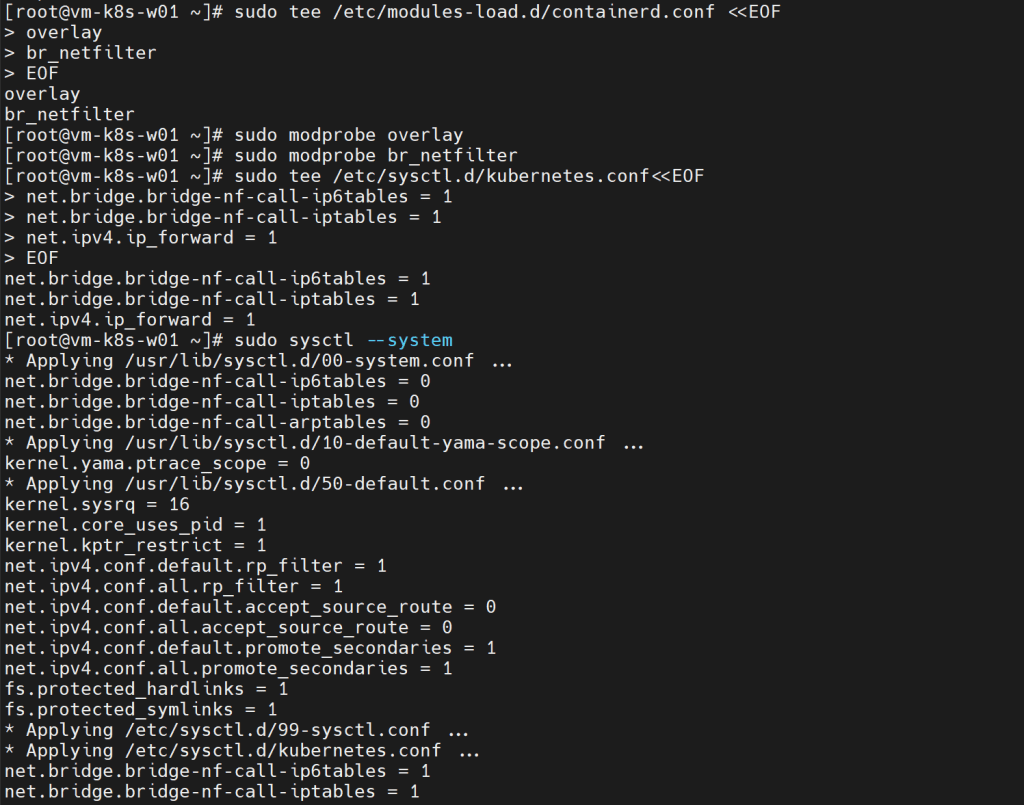
- Create
br_netfilter,overlaymodules and configure sysctl parameters
- Create
sudo tee /etc/modules-load.d/containerd.conf <<EOF
overlay
br_netfilter
EOF

sudo modprobe overlay
sudo modprobe br_netfilter

sudo tee /etc/sysctl.d/kubernetes.conf<<EOF
net.bridge.bridge-nf-call-ip6tables = 1
net.bridge.bridge-nf-call-iptables = 1
net.ipv4.ip_forward = 1
EOF

sudo sysctl --system
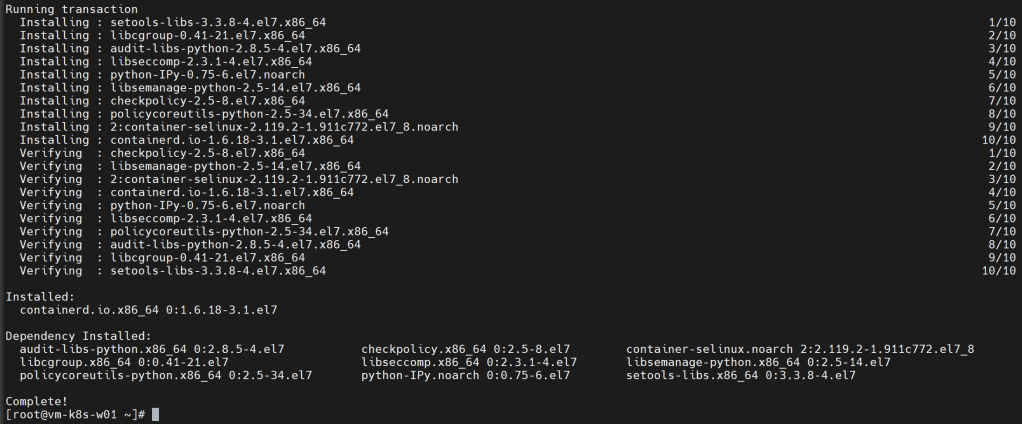
- Post this, install the required packages for containerd and install containerd using yum.
sudo yum install -y yum-utils device-mapper-persistent-data lvm2

sudo yum-config-manager --add-repo https://download.docker.com/linux/centos/docker-ce.repo

sudo yum update -y && yum install -y containerd.io
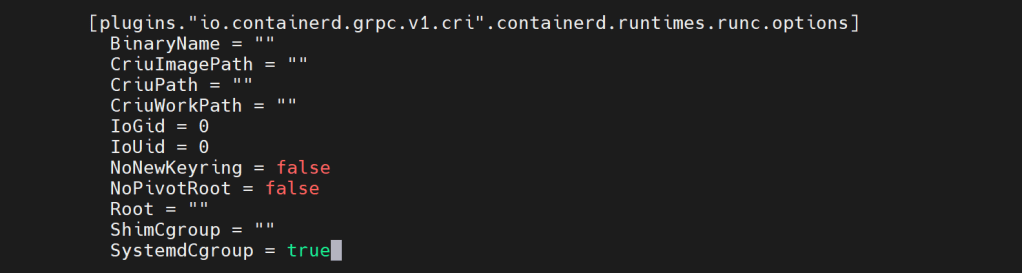
- Let’s configure the containerd services and enable cgroup drivers to utilize systemd instead of cgroupfs. Reason for this change is because if no cgroup is specified in kubeadm it defaults to systemd.
sudo mkdir -p /etc/containerd
sudo containerd config default > /etc/containerd/config.toml

#Change below setting to true in config.toml

[plugins."io.containerd.grpc.v1.cri".containerd.runtimes.runc.options]
            BinaryName = ""
            CriuImagePath = ""
            CriuPath = ""
            CriuWorkPath = ""
            IoGid = 0
            IoUid = 0
            NoNewKeyring = false
            NoPivotRoot = false
            Root = ""
            ShimCgroup = ""
            SystemdCgroup = true
- Disable the firewalld services to avoid any connection refusal due to OS firewall using command
sudo systemctl disable --now firewalld(This is not recommended for production environment, it is a best practice to allow only rules which are required by K8S).
- Enable the kubelet service so it start automatically on startup using command
sudo systemctl enable kubelet
Now, we will run different commands on different nodes.
Configuring Controller Node
- Run the kubeadm init command to initialize K8S services on controller node VM-K8S-M01. Ensure the pod-network-cidr provided is not in use in network and doesn’t conflict with other subnets. It will run preflight checks and informs in case of any warnings else in case of successful bringup it will provide details of cluster.
sudo kubeadm init \
  --pod-network-cidr=192.168.0.0/16 \
  --upload-certs \
  --control-plane-endpoint=k8sapi.lab.local
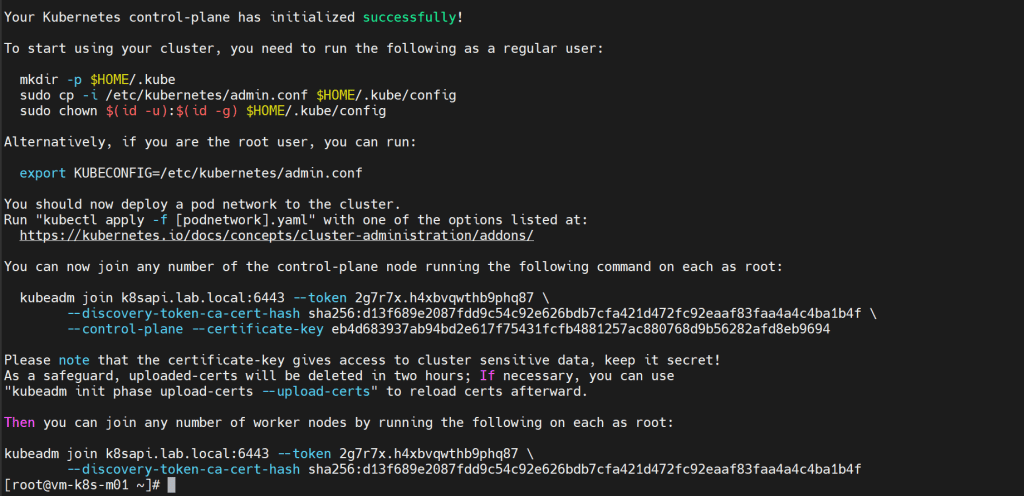
- Use commands below to save kubeconfig file or you can use 2nd command if you are logged in as root.
mkdir -p $HOME/.kube
sudo cp -i /etc/kubernetes/admin.conf $HOME/.kube/config
sudo chown $(id -u):$(id -g) $HOME/.kube/config

#or

export KUBECONFIG=/etc/kubernetes/admin.conf
- You can use kubectl command to view running pods as well. Congratulations, you have setup first node of K8S cluster.

- Before we continue working on and setup worker node, let’s install Antrea CNI on controller node. Installing Antrea CNI is as simple as applying a kubectl command.
kubectl apply -f https://raw.githubusercontent.com/vmware-tanzu/antrea/master/build/yamls/antrea.yml
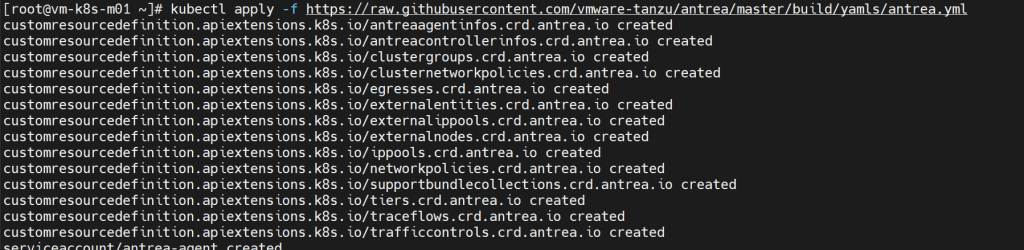
- If you view the pods again in kube-system namespace, you should be able to view two additional for Antrea in creating stage, it takes few seconds to initialize and come online.


This is pretty much from controller node. Let’s head over to worker node now.
configuring worker node
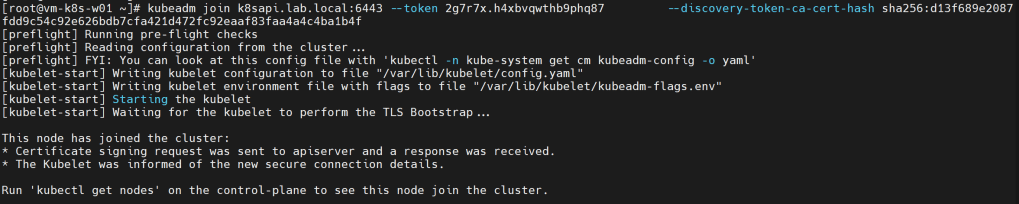
- Use the token code provide by kubeadm earlier to join worker node to control node.
kubeadm join k8sapi.lab.local:6443 --token 2g7r7x.h4xbvqwthb9phq87 --discovery-token-ca-cert-hash sha256:d13f689e2087fdd9c54c92e626bdb7cfa421d472fc92eaaf83faa4a4c4ba1b4f

- Post successful join, it should provide a similar screenshot as below –
- Check the node status with help of kubectl on control node.

- If you check the pods running on worker node, you should be able to see Antrea agent pods in running there.

Conclusion
This was the first blog in multi-series blog on Antrea and NSX. In this blog, we saw how to deploy a vanilla K8S environment and install Antrea CNI on top of it. Reason for not using Tanzu product is to show how Antrea can be leveraged to provide security services on vanilla clusters as well. In next blog, we will see what is Antrea, how does it work and a bit deep dive into Antrea. I hope you enjoy reading this blog as much as I have while preparing it. Thank you.

One thought on “Securing K8S Pods using Antrea with NSX – Part 1”