In this blog we will look at how to deploy and configure vCenter server appliance. I am covering these exam objectives in sequence you will configure a vSphere environment, hence i am covering exam objectives back and forth. As part of this blog, we will cover various deployment models of vCenter server, how to deploy VCSA and what are initial configuration that goes in VCSA.
vCenter Server and Platform Services Controller Deployment Types
As we see in first objective that vCenter server comes in two flavors i.e. vCenter Server Appliance and vCenter server for windows. So before we can starting deploying vCenter server, we need to decide on deployment model. When we say deployment model, we are talking about how Platform services controller will be deployed. We can deploy vCenter server with embedded Platform Services Controller or with an external PSC.
So while deploying vCenter server, we need to select one of three options:
- vCenter server with Embedded PSC
- Platform Services Controller
- vCenter server with an External PSC
Which option to use will depend upon your requirement? So let’s look at various deployment models and their use case.
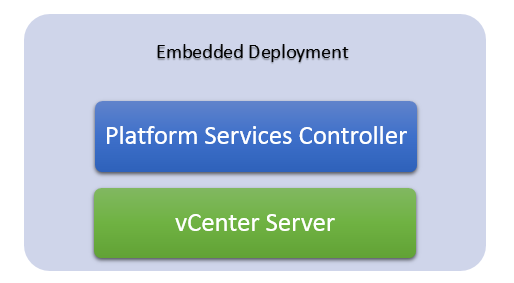
vCenter server with embedded PSC
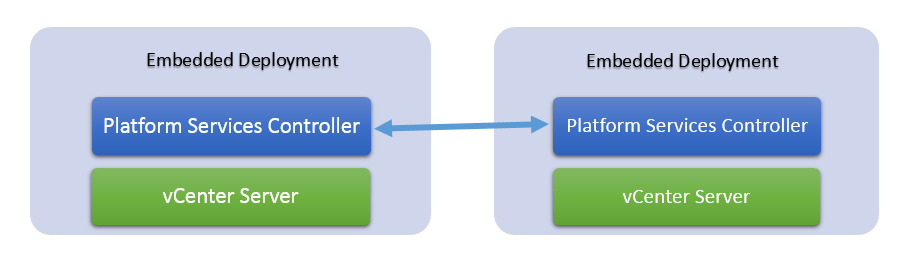
In embedded deployment, a single server is deployed with both PSC as well as vCenter server services. It will have its own single sign-on domain with single site. After vCenter 6.5 Update 2, you can join other embedded deployment to create Enhanced linked mode.
Enhanced Linked mode allows you to manage multiple vCenter server from single vCenter server. In enhanced linked mode, inventories of vCenter server are shared and they join single sign on domain so if you login into one vCenter server, you can manage other vCenter as well.
Embedded enhanced linked mode is when you join embedded deployment to a single sign on domain. Example configuration is similar to below diagram:
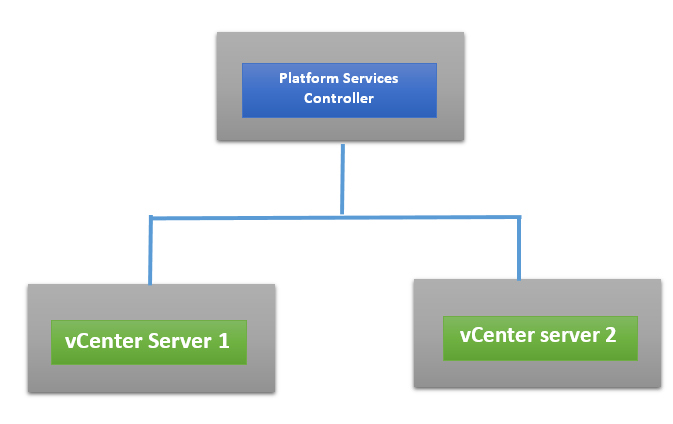
vCenter server with External PSC
When we deploy an external platform services controller, we can create a new single sign-on domain or join an existing single-signon domain with different site. Benefit of using external PSC is, that we can join multiple vCenter servers to one PSC which will enable vCenter to share their inventories so these can be managed from single point as well as certain feature like cross vCenter vmotion is available.
When we use external PSC, communication between vCenter server and PSC happen over network and so it is prone to network failure such as name resolution failure or network isolation which embedded installation is not. Also, multiple VMs are required to deploy this solution so if you are using Windows based vCenter server, it means more licence which means more cost.
vCenter server with external PSC look similar to below:
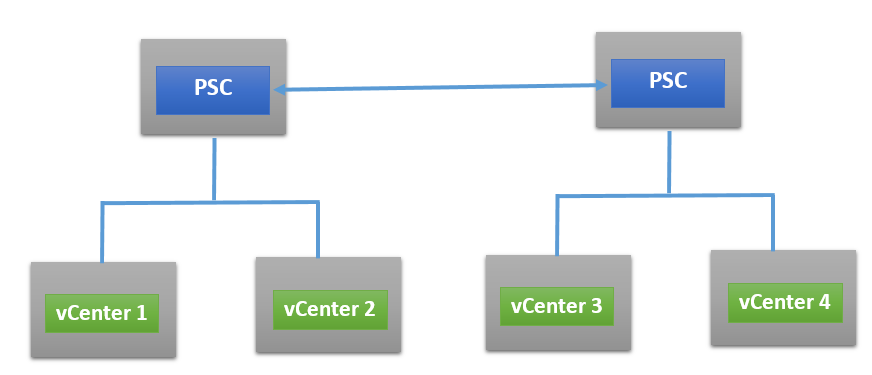
vCenter server single sign-on domain can span multiple sites. So you have PSC running in different sites as well. Similar to below configuration:
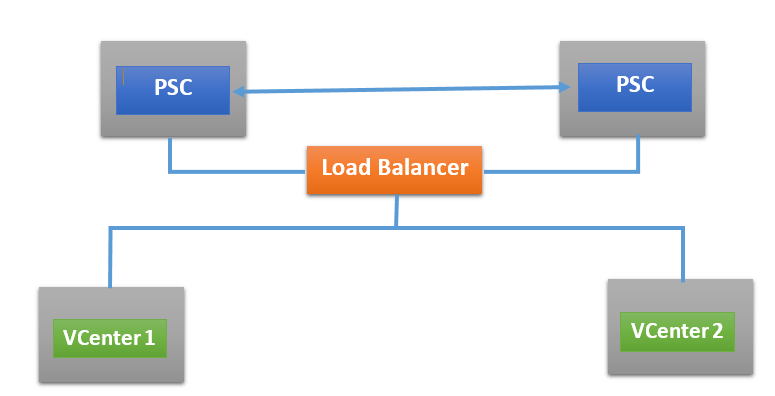
Now, as we can see that in above deployment PSC is a single point of failure. So in external deployment, to avoid failure of PSC, we deploy two PSC and put them behind load balancer. So, if one PSC goes down, requests will be redirected to second PSC. This configuration looks similar to below:
All these configurations are supported by VMware. And PSC supports mixed mode environment as well. We can join Appliance base as well Windows base vCenter server to single PSC. They will not require different PSC of their own.
Deploying vCenter Server Appliance
You can deploy vCenter server appliance either using GUI or CLI. Both methods are supported. As part of this blog, I will be covering GUI method only.
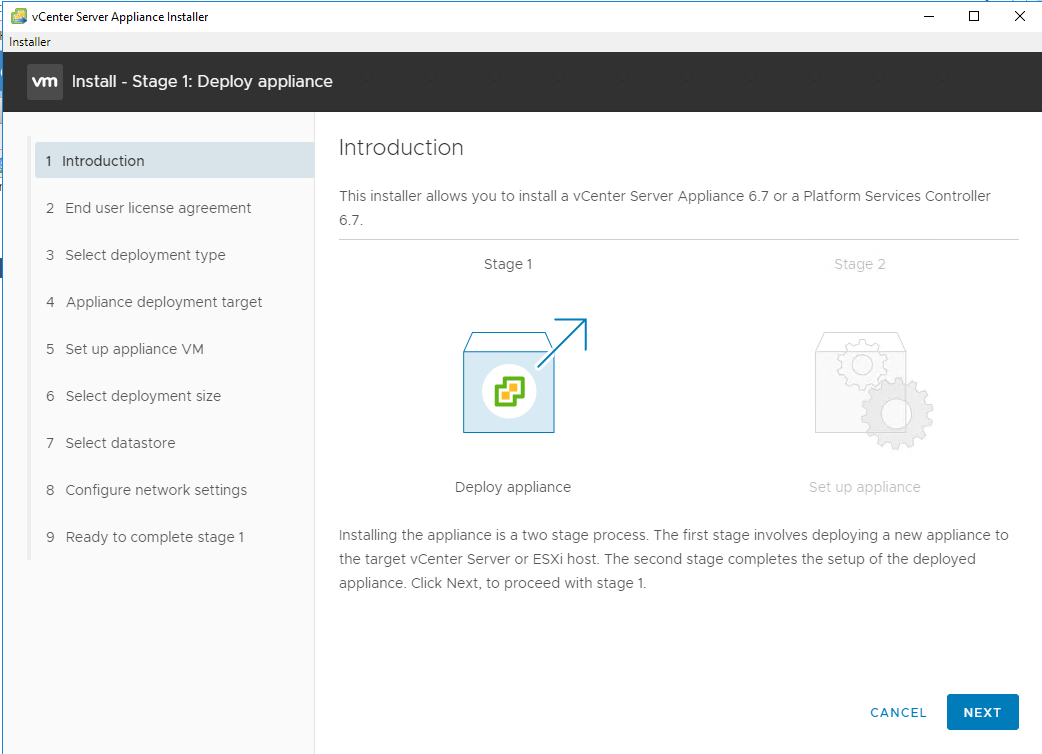
vCenter server appliance is deployed in two stages. In First stage, we deploy OVA and in second stage we perform configuration of appliance and single sign-on domain either creating new domain or joining to existing domain.
So let’s start with deployment
Stage 1 – OVA Deployment
Step 1 – Download vCenter server appliance ISO and mount it on your desktop. Installer file name is similar to below:
VMware-VCSA-all-version-buidnumber.iso
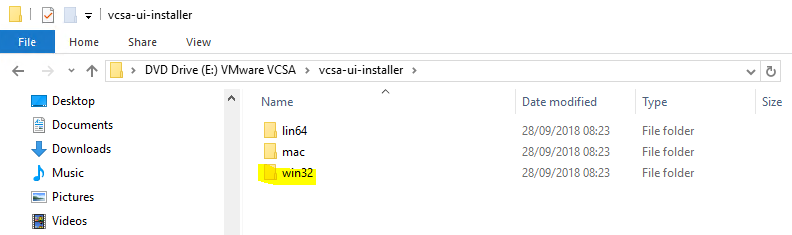
Step 2 – Navigate to vcsa-ui-installer and then inside operating system folder from which you are running installer. In my case, it is windows, hence win32
Step 3 – Run Installer and you will be presented with first window.
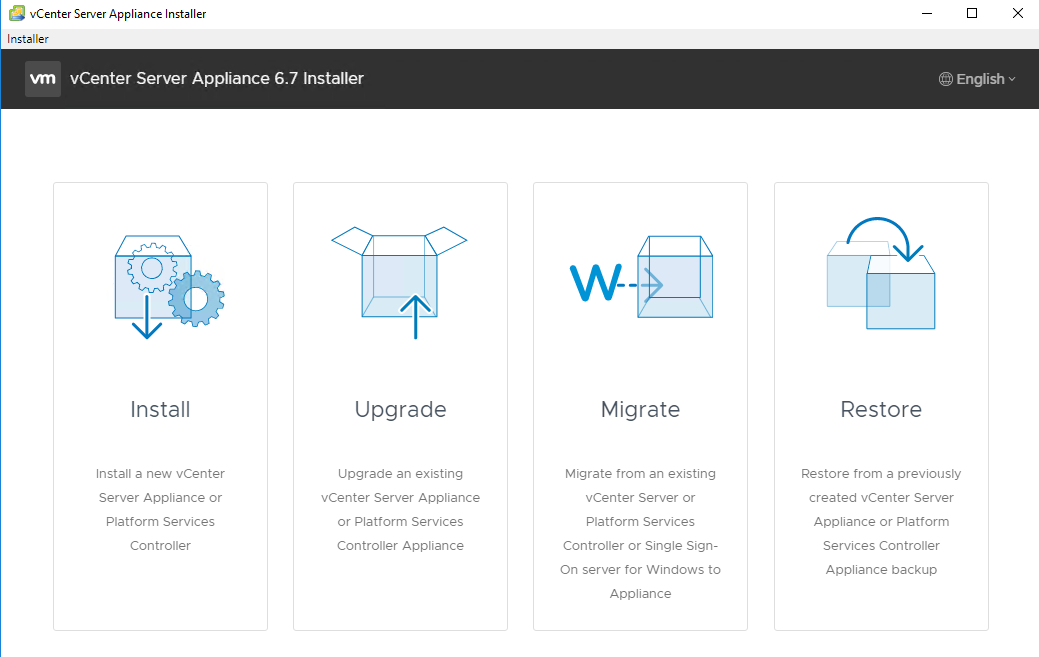
- Installer – Deploy a new vCenter server Appliance
- Upgrade – Upgrade existing vCenter server Appliance
- Migrate – Move your Windows base vCenter server to vCenter server appliance
- Restore – If you have taken backup of vCenter server appliance and want to restore it, then use this option
Step 4 – Click on Install as we are deploying a new vCenter server appliance. And we will be presented with Stage 1. Deploy Appliance.
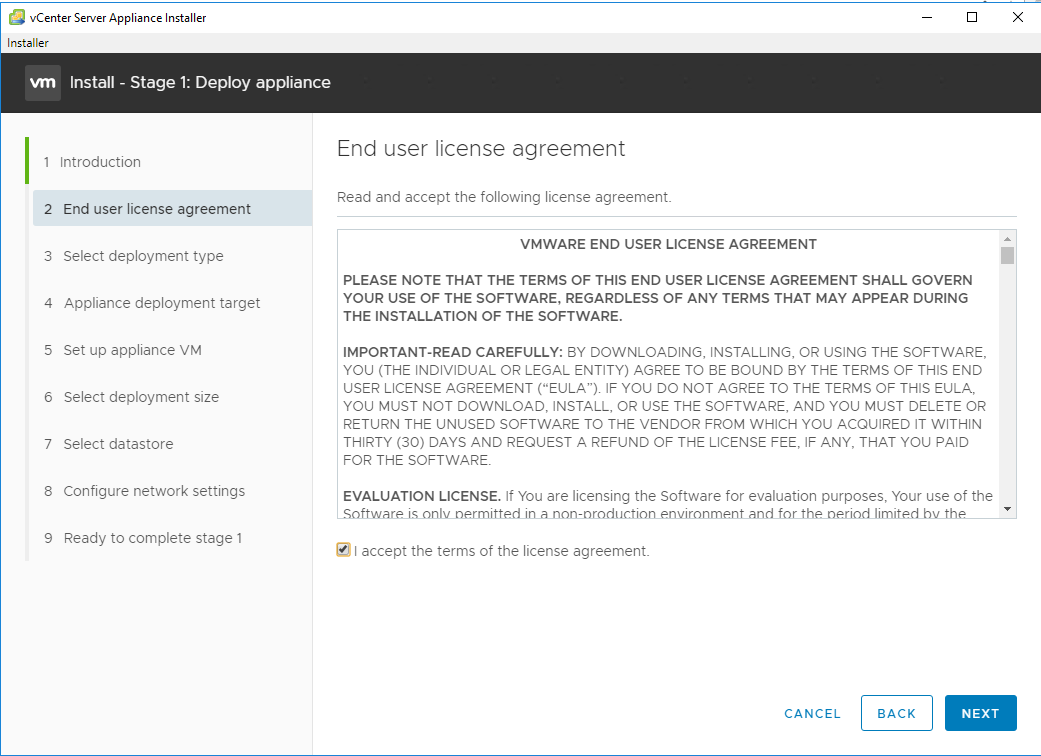
Step 5 – Click Next. Accept VMware EULA by checking the checkbox. Then click Next.
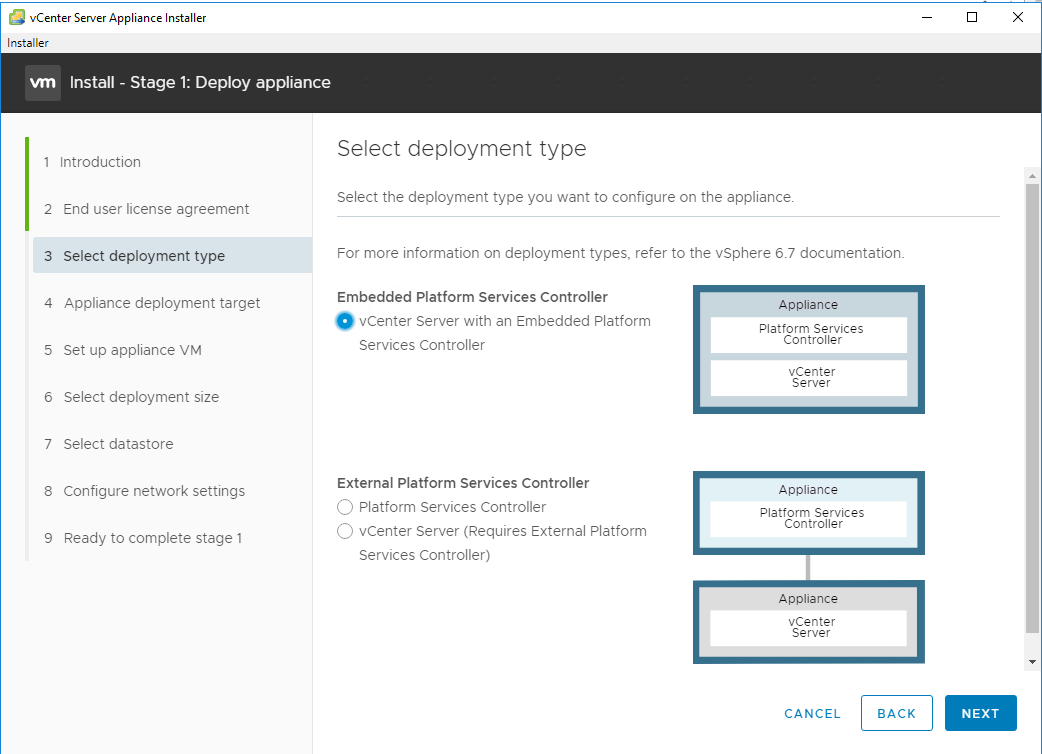
Step 6 – At this point, we will need to select deployment type. So as we discussed above, you can select as per requirement. This can’t be changed later on.
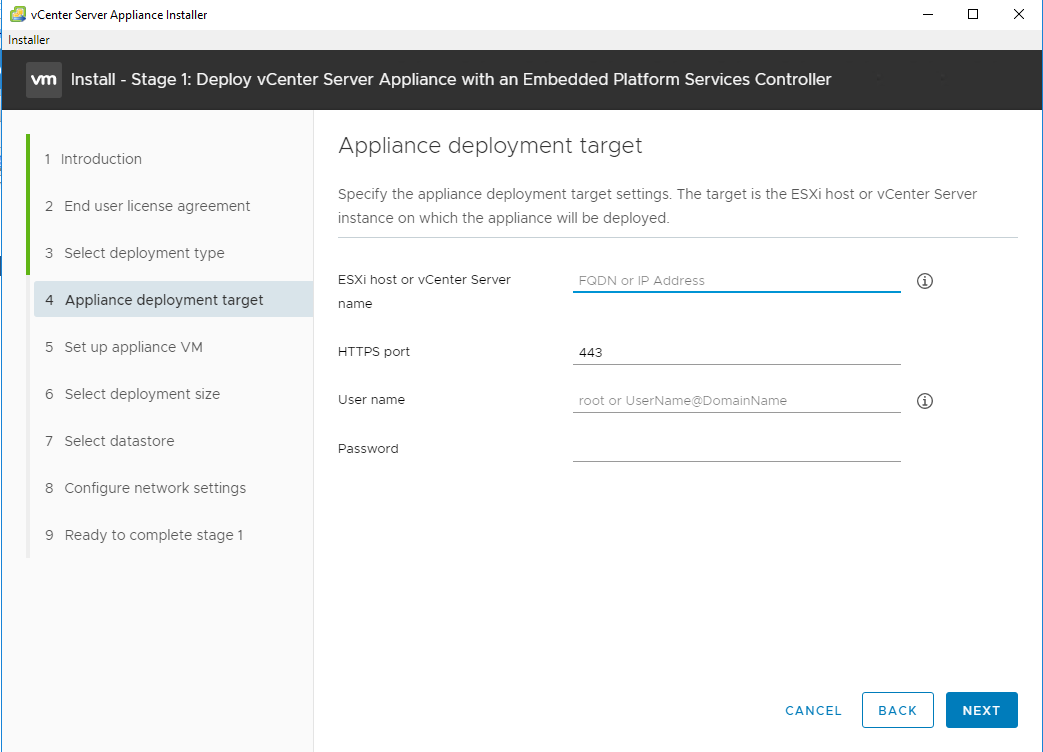
Step 7 – In this step, we need to provide target ESXi host or vCenter server and its credentials. As VCSA is an appliance and appliance is a VM, so it will need a prepared infrastructure ready to run. Provide ESXi or vCenter server name, and credentials.
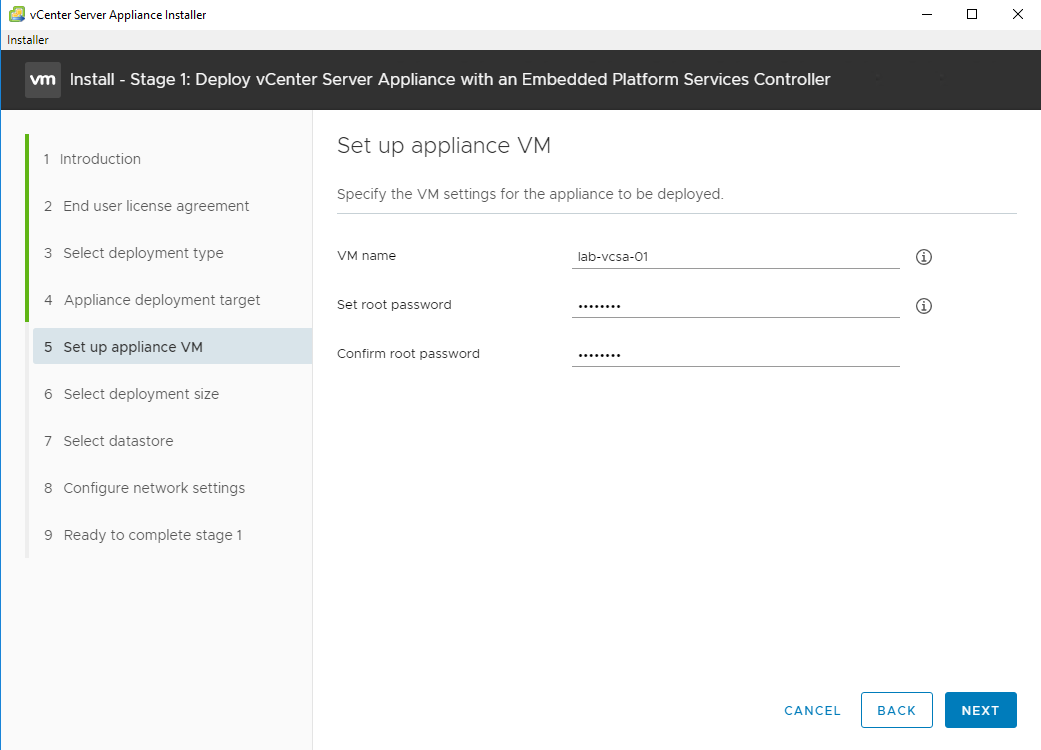
Step 8 – Provide name of vCenter server appliance VM and set its root password which we will need later on.
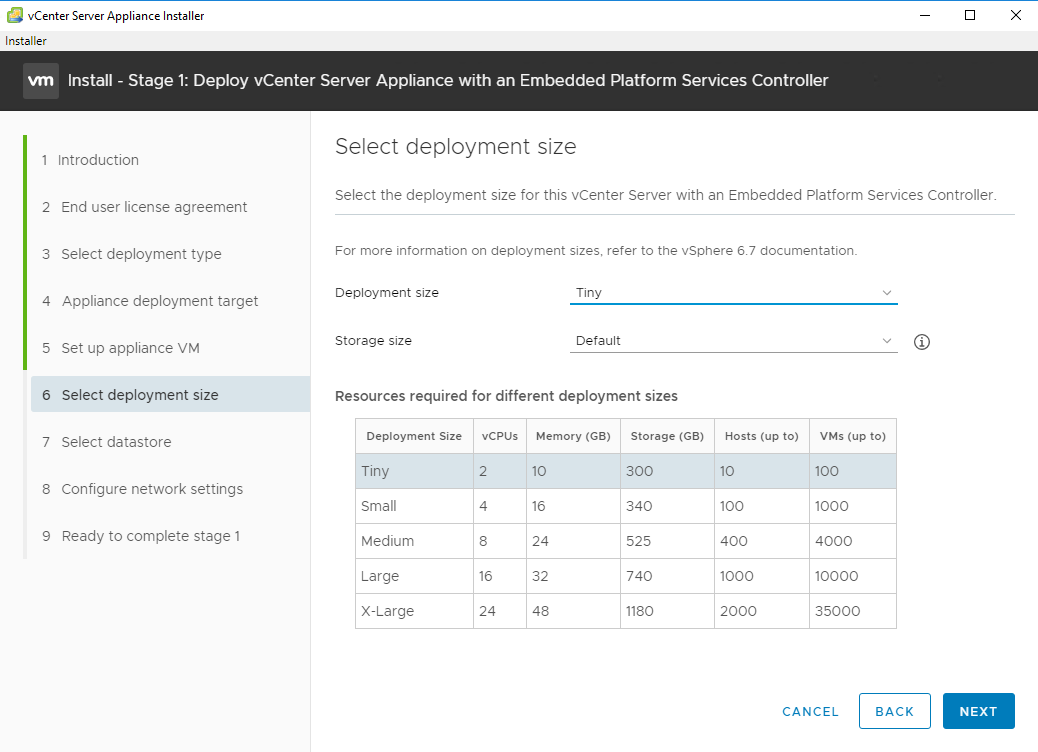
Step 9 – Select the size as per requirement, Make sure to capture future growth as well.
Step 10 – Select datastore which will be used by VM. You can enable thin disk mode as well to give thin provisioning. Default mode is Thick Provisioning.
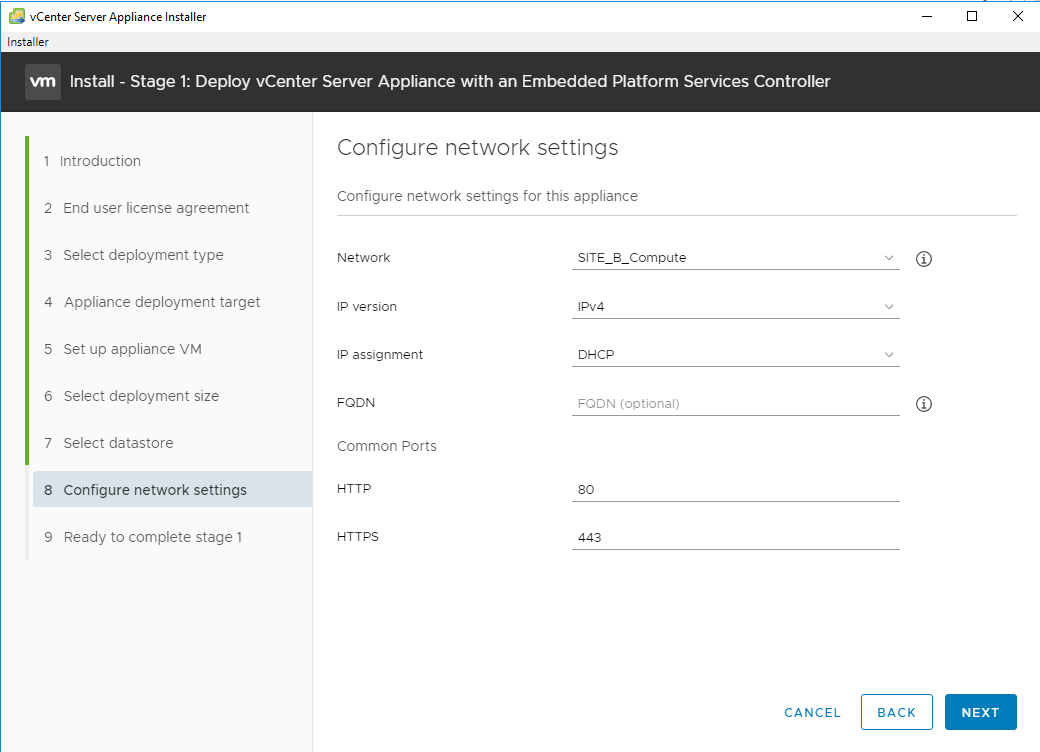
Step 11 – Provide IP Address and other details. If you are using DHCP, make sure IP is reserved for vCenter server in DHCP. Also, FQDN should be resolvable from DNS.
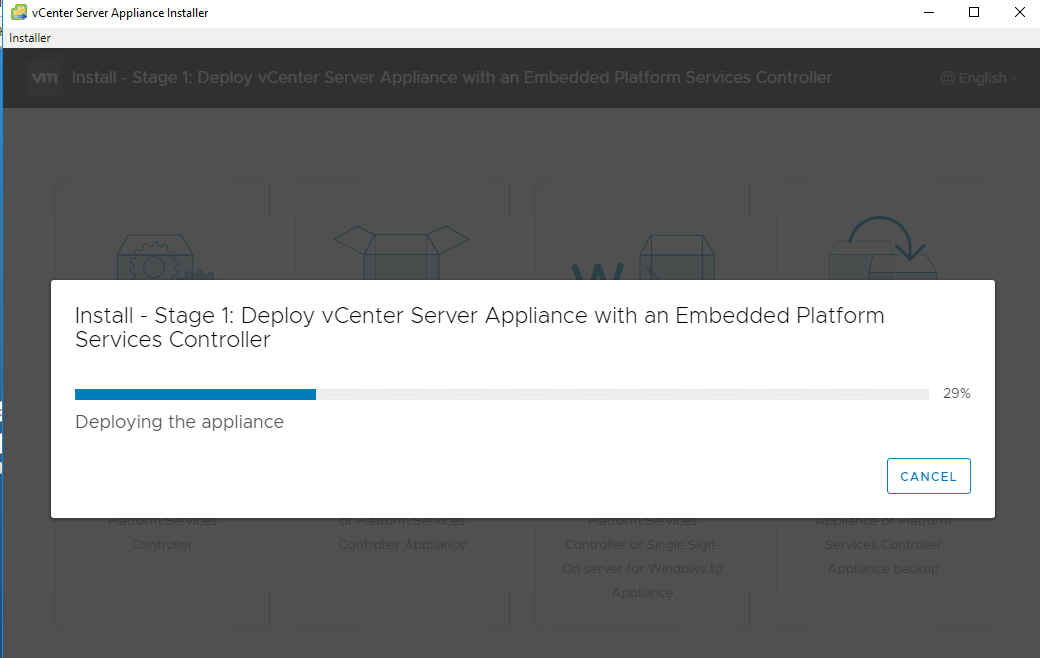
Step 12 – Click on Finish to start deployment. This finishes our stage 1.

Stage 2 – Appliance Configuration
Step 1 – Click Next to start stage 2 with vCenter Server Appliance.

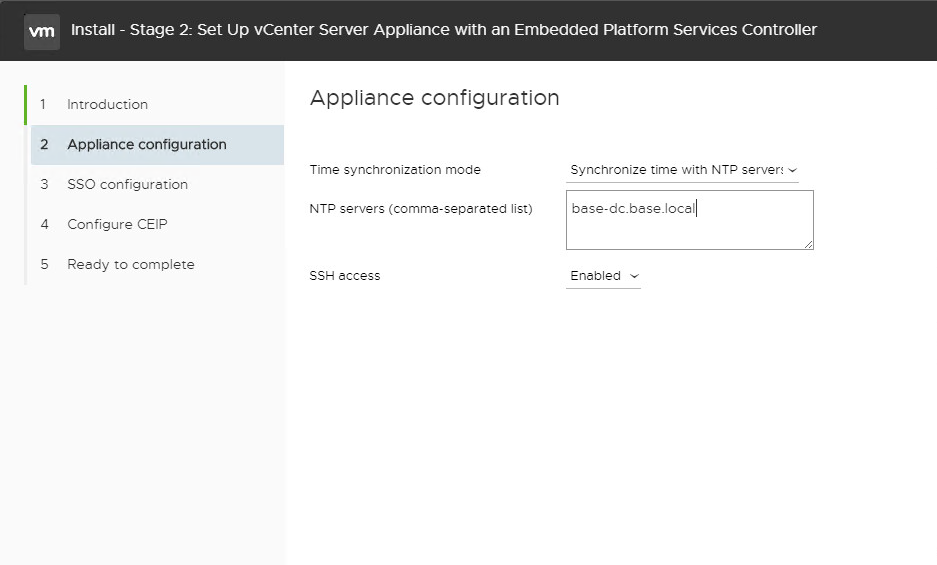
Step 2 – You can enable time sync with host or configure to use External time server. Enable SSH access if required.
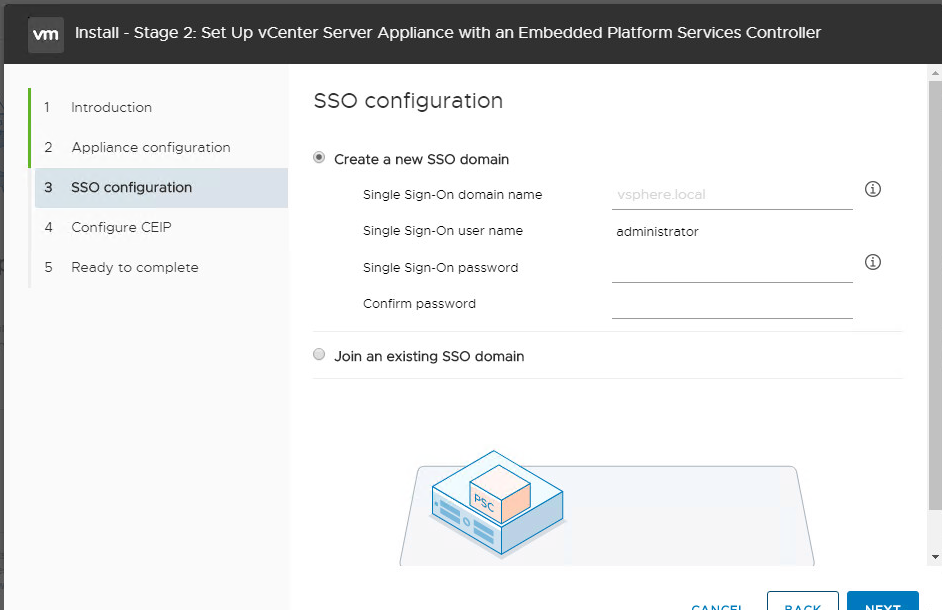
Step 3 – Now, create a new Single Sign-ON domain or you can join it to existing sign-on domain as well. We will setup a new sign-on domain.
- Domain Name – default is vsphere.local or you can change it
- Sign-on User – administrator (default)
- Password – Please provide password, use this later on to login in vCenter server
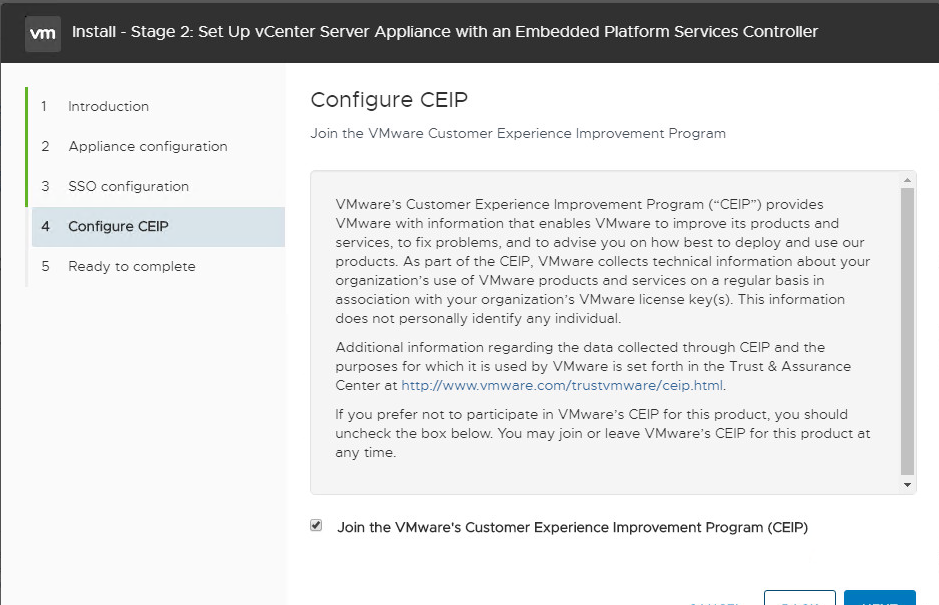
Step 4 – Enabe Customer Experience Improvement Program or choose to disable it.
Step 5 – Validate settings, as these cannot be changed later on, click on Finish.
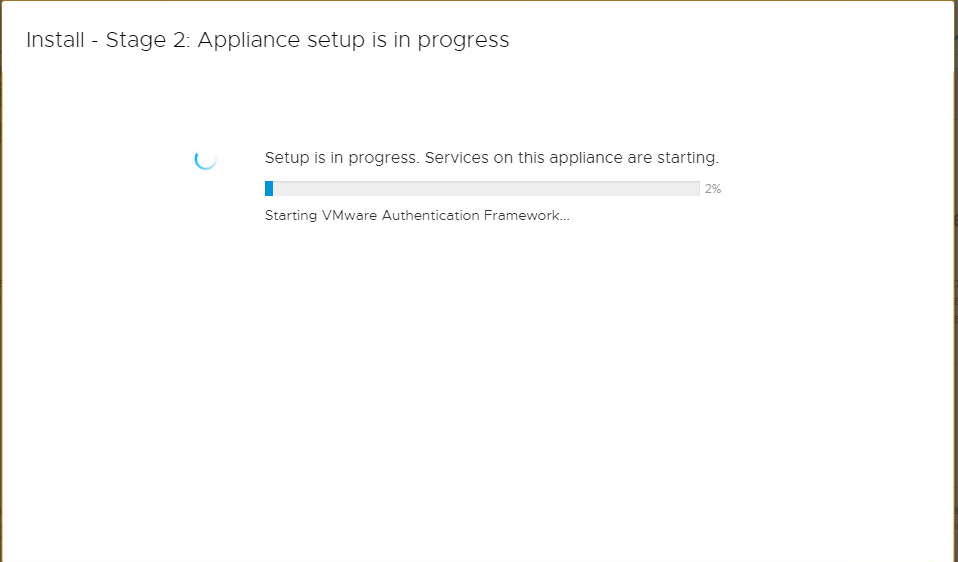
This concludes our Stage 2. Once all services are started and configured, you will be able to login into vCenter server. In next section, we will start with initial setup of vCenter server.
After you Deployed vCenter server Appliance
Logging into vSphere Client
Step 1 – Open Web browser and type below address to go to vSphere client.
https://<FQDN or IP address of vCenter server>/ui
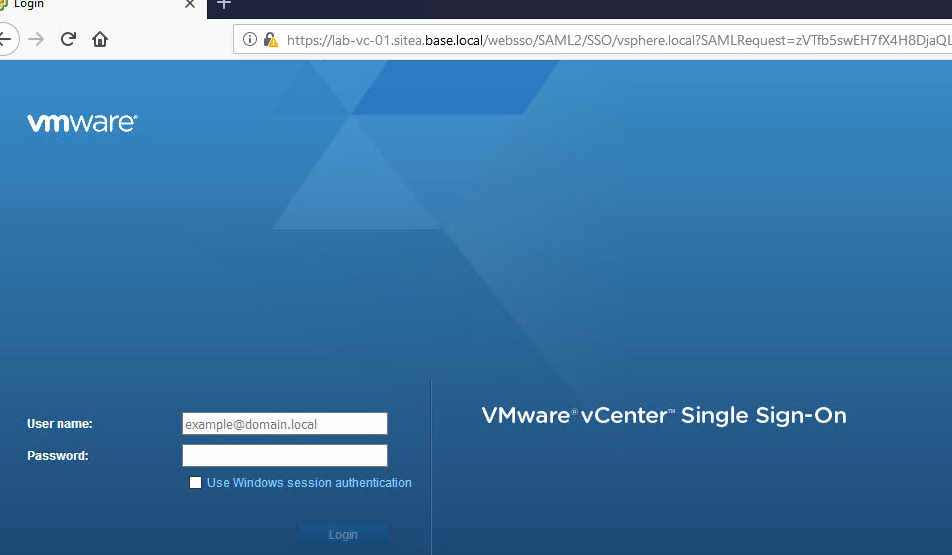
Step 2 – Provide username as administrator@vspheredomain and SSO administrator password.
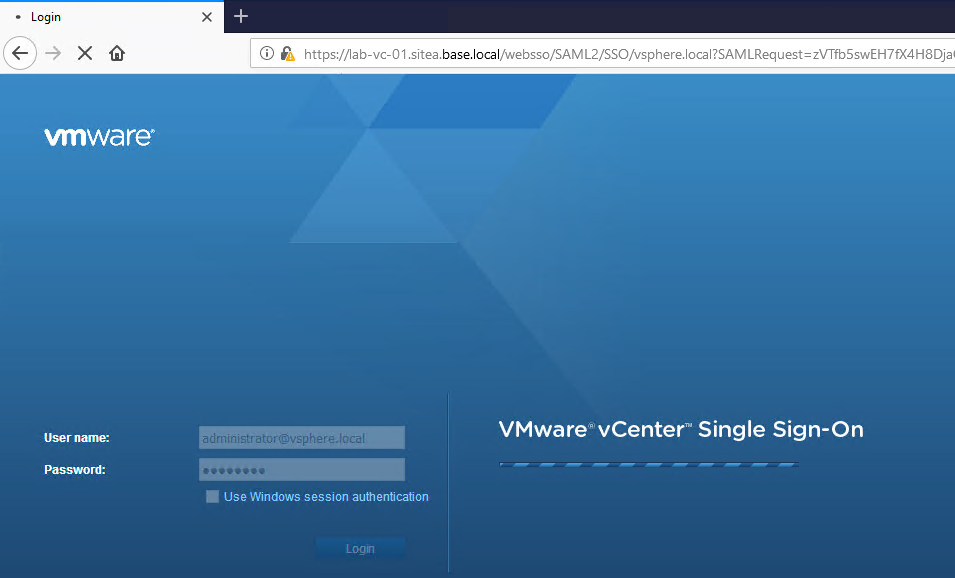
Step 3 – First login into vCenter server UI.
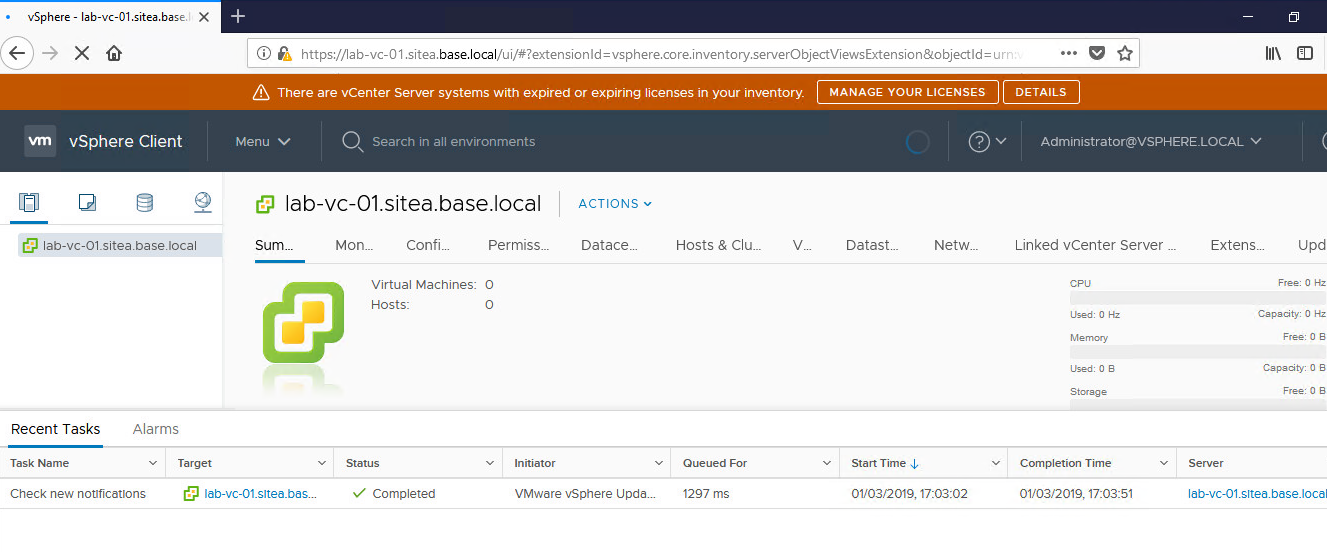
You can install Enhanced Authentication client as well so you won’t have to enter credentials manually every time and it can use integrated Windows credentials to log you in vCenter server.
Configuring vCenter Server Licence
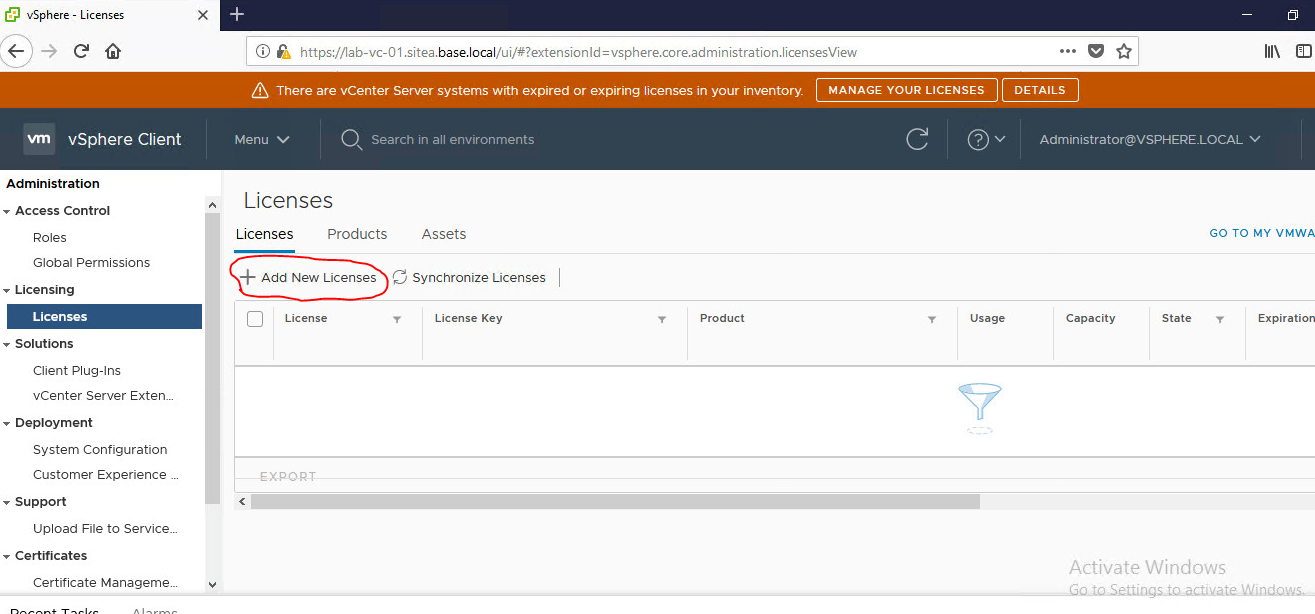
Step 1 – Login into vCenter vSphere client.
Step 2 – Go to Menu -> Administration

Step 3 – Navigate to Licences and click on Add New Licence.
Step 4 – Add licence key per line.
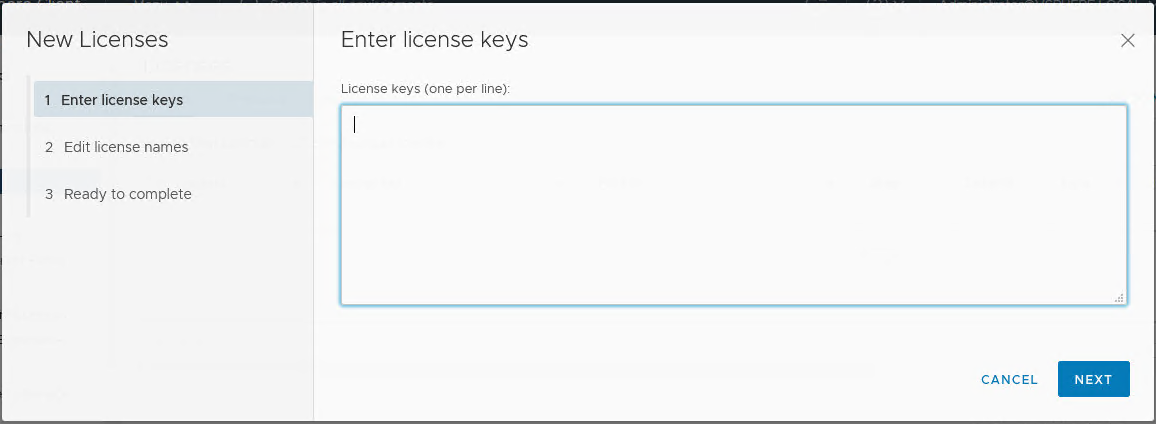
Step 5 – Click Next twice and click on confirm to add licence to your vCenter server.
There are much more configuration to be done in vCenter server but we have exam objective for them as well. So I will stop here as part of this objective and will come back with other articles. I hope you enjoy this article. See you all soon.
Feedback and corrections are welcome. Happy Learning.
