It’s been a while since my last bog on configuring virtual networking as I got stuck with some issues and work. I am drafting those issues as part of blog as some were quite interesting. So keep following as more adventure is yet to come. In last blog, we look at how to configure virtual switches. In this part, we will see how to manage virtual networking. How to add new hosts or change existing networking policies? So let’s start.
Managing vSphere Standard Switch
Management of a vSS is relatively easy and is done from ESXi hosts. Please find below step by step guide. I will cover network policies in end so you can skip to end if you are looking for network policies.
Step 1 – Login into vSphere client and navigate to host -> Configure -> Networking -> Virtual Switches

Step 2 – Click on Add Networking to add new VM Port group or VMkernel Port or Physical Adapter in existing switch.

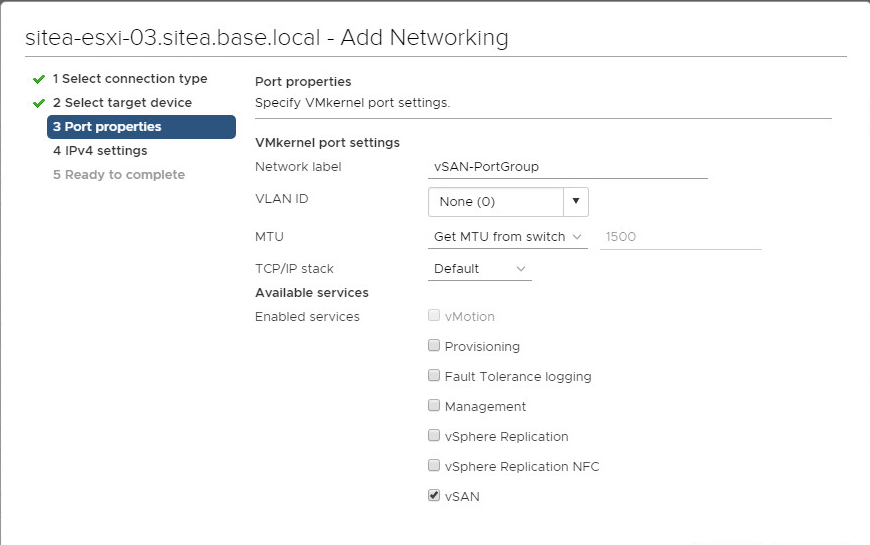
Step 3a – Select VMkernel Network Adapter to create a new vmkernel port and select existing switch.

Step 3b – Provide a network label name to identify port. Provide VLAN ID if required, and select the service of which traffic this port will carry.
Step 3c – Provide IPv4 address either using DHCP or static and click next to create a new VMkernel Port.

Step 4a – Select Virtual Machine port group if you want to connect your VMs to this port group and select existing switch.

Step 4b – Provide a network label to identify network and VLAN ID if required.

Step 5 – Click Next and Finish to create a new either VMkernel Port or VM Port Group.
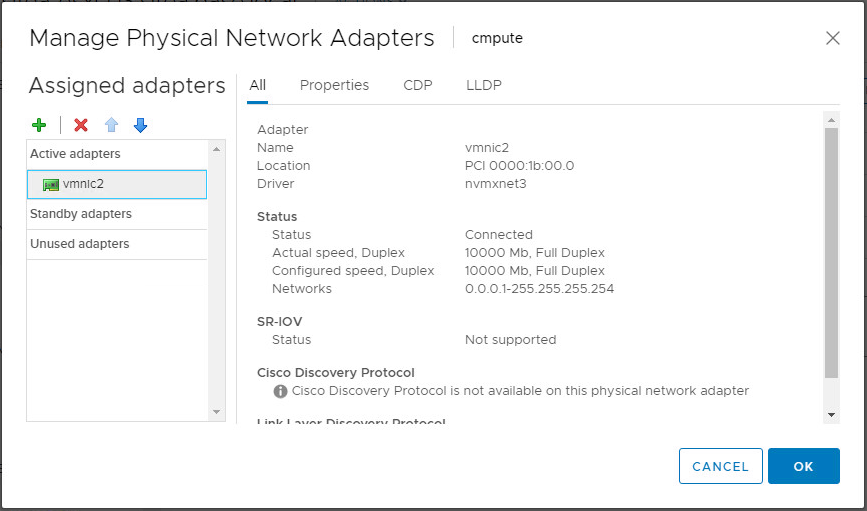
Step 6 – Click on Manage Physical Adapters to add or remove uplinks from vSS.

Step 7 – Click on Green Plus sign to add a new Physical Adapter as uplink in vSS. Or Select an existing uplink and click on Red Cross sign to remove it from vSS.
Step 8 – Click on three … to edit port group and its policies.
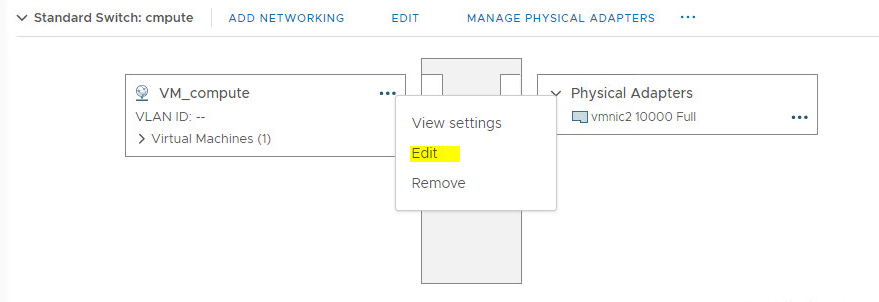
Step 9 – You can change name or VLAN ID or configure network policies here.

This conclude management of vSS switch and next we will look at vDS switch management.
Managing vSphere Distributed Switch
We manage vDS networking from vCenter server Networking view. But certain settings such as changing managing physical adapters or migrating virtual adapter can be managed from ESXi host as well.
Add or Manage Host in vSphere Distributed Switch
Step 1 – Login into vSphere client and navigate to Networking. Select Distributed switch you want to manage. Go to Action -> Add and Manage Hosts…

Step 2 – Select one of below:
- Add hosts – If you want to add new hosts to distributed switch
- Manage Host networking – If you want to migrate VMs or vmkernel adapter on already added hosts, or change their physical adapter
- Remove Hosts – Remove an existing host from distributed switch

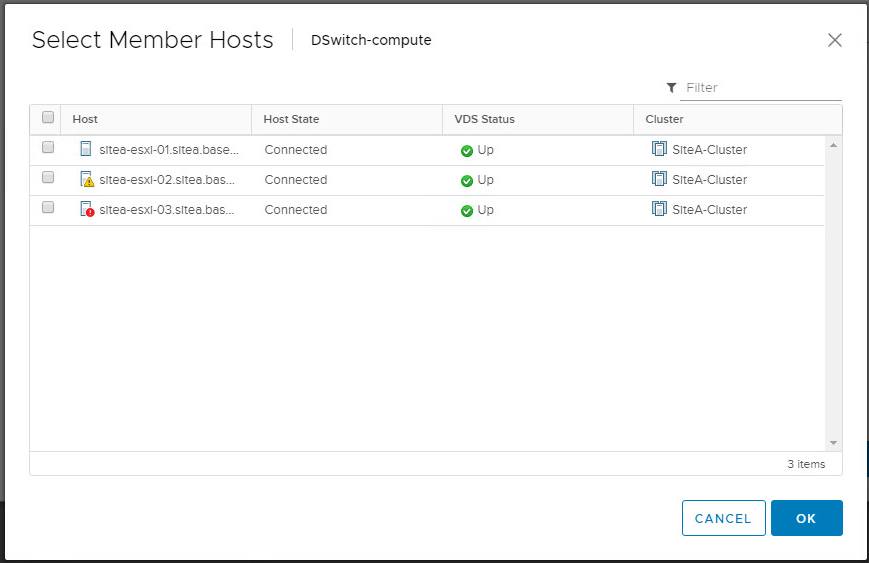
Step 3 – Click on Green Plus to include hosts which you want to add/manage or remove.
Step 4 – First window presented will be of Manage Physical Adapters. Click on vmnic which you want to assign to uplink and select assign uplink.

Note – Use Apply this uplink assignment option to perform similar assignment on all hosts in one go.
Step 5 – Next window will manage vmkernel adapters. If you want to migrate vmkernel adapters, then click on vmk<x> which you want to migrate and select assign port group to migrate them to select distributed port group.

Step 6 – This final step is to migrate VM networking.

Step 7 – Select the VM and use Assign Port Group option to migrate VM to new distributed port similar to previous step.
Step 8 – Click Next and Finish to review changes and perform updates.
Migrate VMs from One Network to Another
vDS provide a cool feature which enables you to migrate all VMs in one go to a destination network instead of migrating each VM individually.
Step 1 – Right click on source port group (or use action menu) from which you want to migrate VMs and select Migrate VMs to Another Network.

Step2 – In Destination Network, click on browse and select destination port group to which you want to move your VMs.

Step 3 – Click next and select All Virtual Machines to migrate all or select individually to migrate selected VMs.
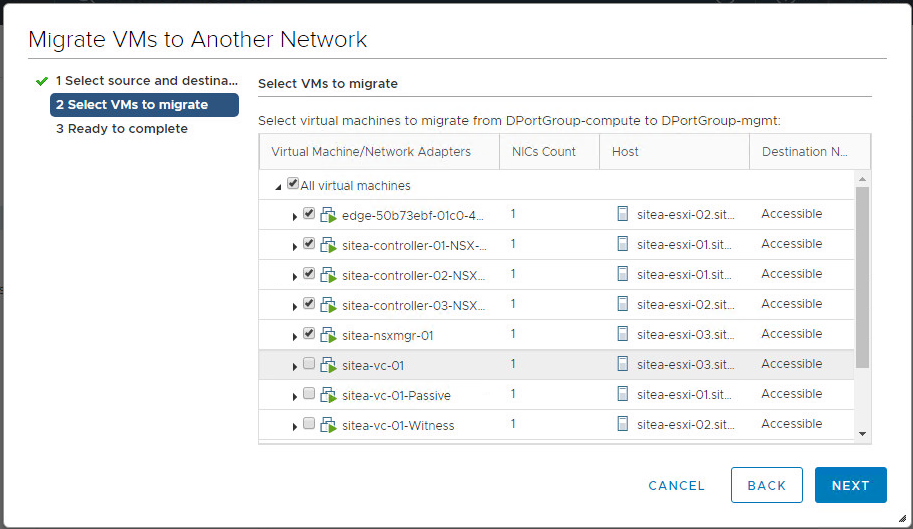
Step 4 – Click Finish to start migration of VMs.

Add a new Distributed Port Group
It’s very simple to add a new distributed port group. You need to go to distributed switch, right click or use action menu to create a new distributed port group. Define different networking policies and you are done. J
Managing Network Policies
We apply networking policies differently on vSphere Standard Switches and vSphere Distributed Switches. But policies which are available for vSphere Distributed Switch might not be available for vSS.
Let’s look at different policies which can be applied on switch object for vSS and vDS.
| Virtual Switch | Virtual Switch Object | Description |
| vSphere Standard Switch | Entire switch | Policies applied at switch level will propagate to all standard port groups. |
| Standard Port Group | Policies applied at standard port group will override inherited policies from switch providing more granular control. | |
| vSphere Distributed Switch | Distributed port group | When you apply policies on a distributed port group, the policies are propagated to all ports in the group. |
| Distributed port | You can apply different policies on individual distributed ports by overriding the policies that are inherited from the distributed port group. | |
| Uplink port group | Policies applied at uplink port group will get propagated to all ports under uplink port group | |
| Uplink port | You can apply different policies on individual distributed ports by overriding the policies that are inherited from the uplink port group. |
Different policies available for vSS and vDS
| Policy | vSS | vDS | Description |
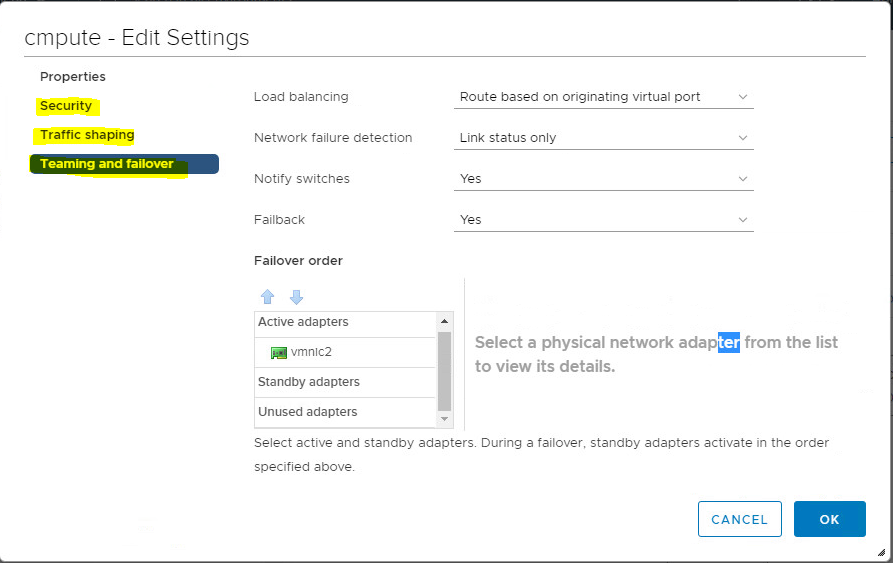
| Teaming and failover | Yes | Yes | This configure physical adapters that handles network traffic, we can arrange physical adapters to provide failover order or load balancing options |
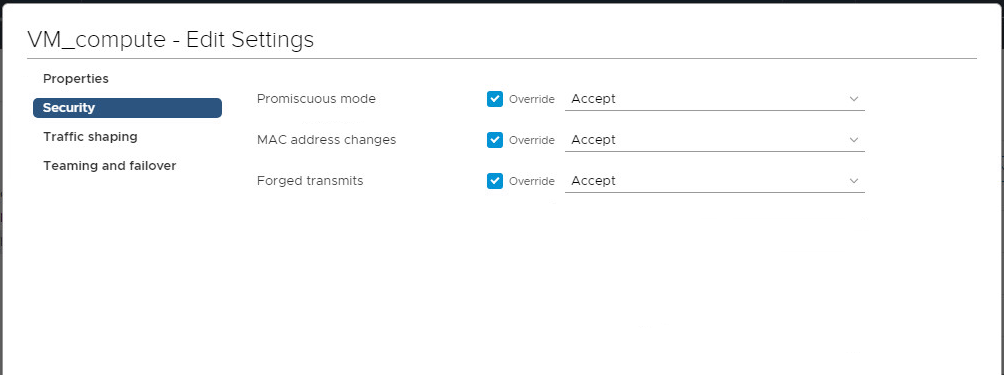
| Security | Yes | Yes | Provides protection of traffic against MAC address impersonation and unwanted port scanning. The networking security policy is implemented in Layer 2 of the networking protocol stack. |
| Traffic shaping | Yes | Yes | Let’s you restrict the network bandwidth that is available to ports, but also to allow bursts of traffic to flow through at higher speeds. |
| VLAN | Yes | Yes | Using this we configure the VLAN tagging for a standard or distributed switch. You can configure External Switch Tagging(EST), Virtual Switch Tagging (VST), and Virtual Guest Tagging (VGT). |
| Monitoring | No | Yes | Enables and disables NetFlow monitoring on a distributed port or port group. |
| Traffic filtering and marking | No | Yes | Lest you protect the virtual network from unwanted traffic and security attacks or apply a QoS tag to a certain traffic type. |
| Resources allocation | No | Yes | Provide better control the bandwidth that is available to the port or port group |
| Port blocking | No | Yes | Let’s you selectively block ports from sending and receiving data. |
Configure Overriding Networking Policies on Port Level
Step 1 – Login into vSphere Client and navigate to networking.
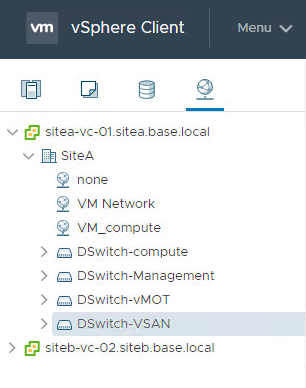
Step 2 – Expand Distibuted Switch and Select Port group of which you want to enable override at port level. Right click and select Edit Settings.

Step 3 – Go to Advanced and select overrides which needs to be enabled at port level.
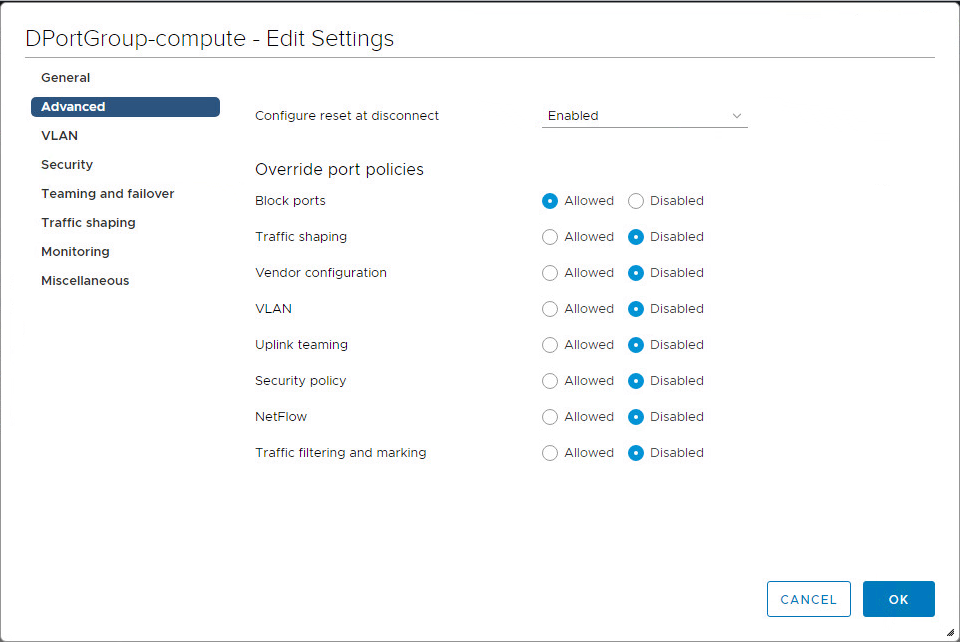
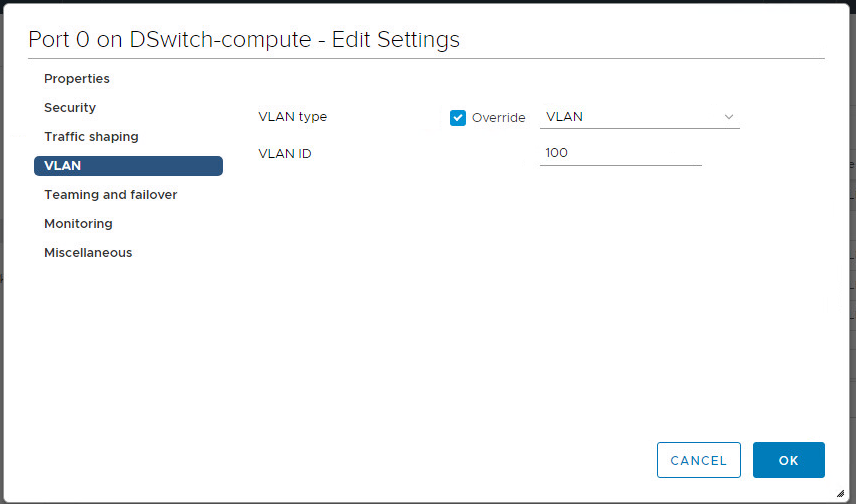
Step 4 – Click ok and then go to individual port to override inherited policies from distributed port group.
Managing vSS Network Policies
Step 1 – Go to Host -> Configure -> Networking -> Virtual Switches

Step 2 – Click on Edit. Here you can define policies at switch level.
Step 3 – Click on three dots (…) beside standard port group to edit network policies at port group level.

Step 4 – Click on Edit and here you can override policies defined at switch level.
This conclude our topic on managing virtual networking. If you like to know more about virtual networking about LACP or Network policies, then let me know and I will cover them as a separate article. I hope you enjoy this. As always feedback and corrections are welcome.
Further Reading and Reference

One thought on “Objective 7.1 – Manage virtual networking”