In previous blogs, we have seen how to deploy vRealize Automation 8.1 and how to configure Active Directory to provide access to users/group on vRealize Automation 8.1. You can follow below links to visit previous blogs:
- vRealize Automation 8.1 Deployment – Step by Step
- vRealize Automation 8.1 Initial Configuration – Part 1
- vRealize Automation 8.1 Initial Configuration – Part 2
- vRealize Automation 8.1 Initial Configuration – Part 3
In this blog, I will cover configuration for Cloud Assembly which includes integrating and managing infrastructure with vRealize Automation, how to create blueprint and deploying a machine from Cloud Assembly. So, let’s get started.
Configuring Cloud Assembly
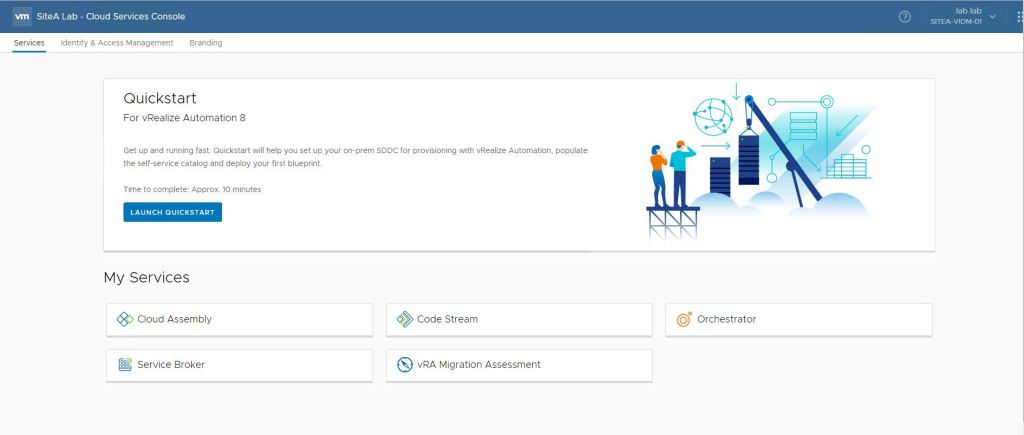
- Login into vRealize Automation Portal with Cloud Assembly Administrator access. Under My Services, click on Cloud Assembly.
- Go to Infrastructure and then Cloud Accounts. Click on Add Cloud Account to start adding infrastructure.
- Cloud Account is similar to Endpoint in vRA 7.x environment. As we create endpoint to enable provisioning on infrastructure, similarly in vRA 8.x, we need to create Cloud Accounts.

- Select the type of account, you want to integrate with vRA 8.1. I will be integrating vCenter and NSX-T environment as part of this guide. So, first select vCenter.

- It will present window to add new Cloud Account. Provide below details:
- Name – To identify cloud accounts
- vCenter IP Address/FQDN – vCenter server you want to integrate for provisioning
- UserName – User account with access to vCenter server
- Password – Password for vCenter user account
- Click Validate
- Select Datacenter to which provisioning should be allowed.
- NSX EndPoint – Leave it blank, we will configure it soon
- Capability Tags – We will look at these soon, leave blank default

- Similarly, connect to NSX-T manager by providing requested details. In vSphere Endpoint, select vCenter Cloud Account, created in last step.

- You should have two cloud accounts configured with Status Ok. Similarly, you can configure AWS, Azure or GCP cloud accounts as well.

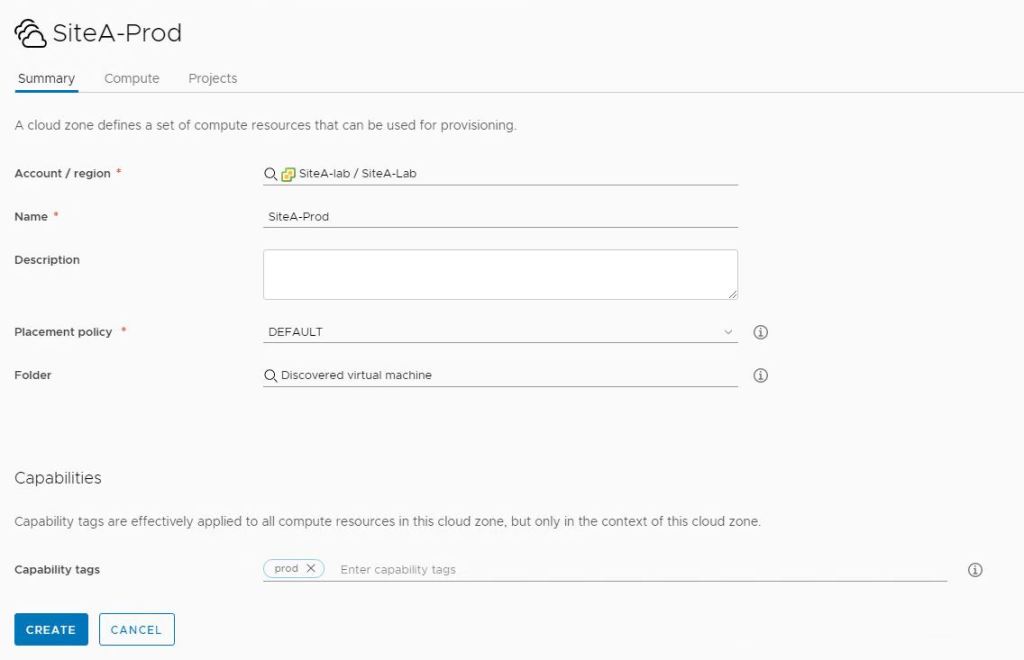
- Now, that we have configured Cloud Accounts, it is time to configure Cloud Zones. Cloud Zones are similar to Fabric in vRA 7.x. We create cloud Zones to provide compute resources to our deployments. Let’s take quick look at few key terms:
- Placement Policy – You need to select Placement Policy while creating cloud zone. This define how are your workload going to be deployed on your compute resources. In case of vSphere, on your clusters. It can be:
- Default – Random placement
- binpack – Places compute resources on the most loaded host that has enough available resources to run the given compute
- spread – evenly distribute load at deployment level
- Capability Tags – Capability tags work with constraint tags to control provisioning of resources. These can be compare to Reservation Policy in vRA 7.x. To understand it:
- In my scenario, I have created two cloud zones for Production and QA workloads. I want to give choice to users to deploy either prod or QA VMs but at same time, I want to control their deployment in their respective cloud zones. This is where Capability tags comes in handy. I have created a capability tag called prod and assign it to my Cloud Zone SiteA-Prod. Now, whenever user selects Prod in deployment, VM will be deployed to SiteA-Prod, as there is only one cloud zone with capability tag of prod.
- Placement Policy – You need to select Placement Policy while creating cloud zone. This define how are your workload going to be deployed on your compute resources. In case of vSphere, on your clusters. It can be:
- Going further into Compute tag, it will list all Cluster and Resource Pool which will be used for deployments. If you need to filter clusters or need to select only one, then again you need to tag your compute resources.
- Click the Check box of desired compute cluster or pool, Click on Tags and give a meaning name for tag. For e.g. Production
- Go to Filter Tags: and enter value for tags
- It will now show only desired cluster. Save it and you have successfully created cloud zone.

- After you have created, all desired cloud zones, Click on Projects Tab, and Add Project.
- Project are similar to Business Group in vRA 7.x and they provide access to Cloud Assembly blueprints and provide control where the blueprints are deployed.

- Give a desired Name and description.

- Go to users, Add users/groups with Administrator or Members access to provide access to Cloud Assembly deployments.

- Go to provisioning tab and add cloud zones in which deployments can be provisioned.

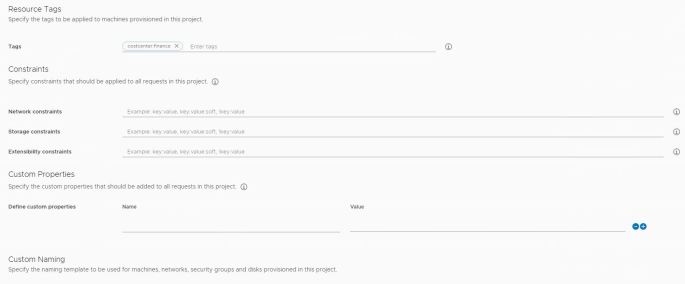
- Under Resource Tags, you can add tag in form of key:value pair to create tags on VMs in vCenter server.
- You can define constraints or custome properties to control provisioning of deployments.
- Another feature is Custom Naming.
- You can use custom names to deploy VMs. Such as FIN${######}
- This will create VM name as FIN000001 and incrementing by 1.
- Click Create to finish creating project.
- Go to Infrastructure > Network Profile > Create Network Profile.
- Select Account/region created earlier
- Provide name to identify Network Profile in blueprint
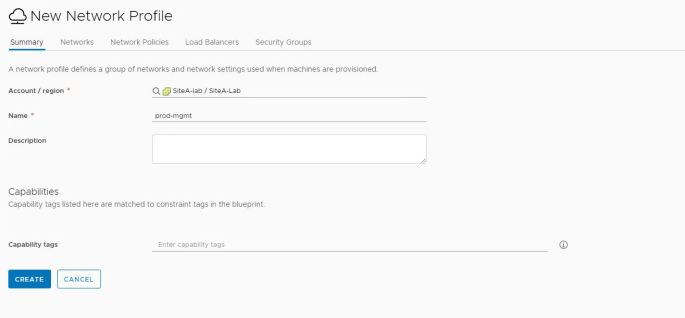
- Go to Networks, and Click on Add Network to add either vSphere distributed port groups or NSX-T Segments as part of Network Profile.

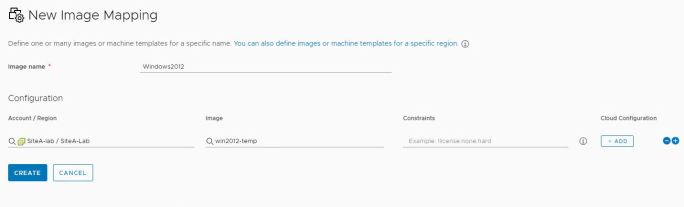
- Next is image Mapping. Go to Infrastructure > Image Mapping and create new mapping.
- Provide Image Name
- Select Accounts and vRA load all templates present under vCenter server
- Select appropriate template and click create to finish create image mapping.
- In order to provision T-Shirt size VMs, you can create Flavour Mappings.
- Go to Infrastructure > Flavour Mapping > Create Flavour Mapping
- Select Flavour such as Small, Tiny and provide appropriate CPU and Memory.
- Click Create to create multiple flavour mappings.

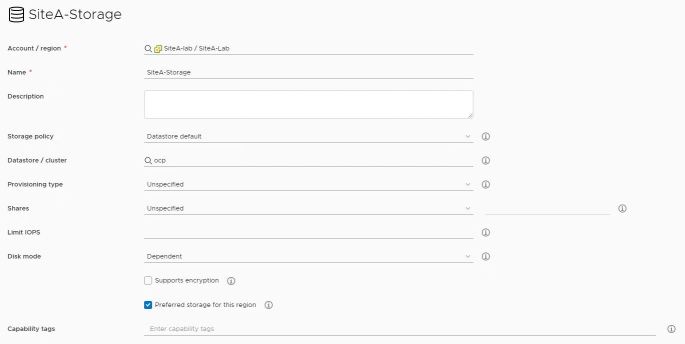
- Similarly, create Storage Profile to provide storage location for deployments.
- Ok, so all is done and complete. We have integrate our infrastructure with vRA for provisioning deployments on it. It is now time to create some blueprint and test all is working fine or not.
- Go to Design > Blueprints > +New
- Give Blueprint a Name
- Select Project to which blueprint belongs to
- Choose if blueprint can be shared with other projects or not.
- And you will be presented with canvas.
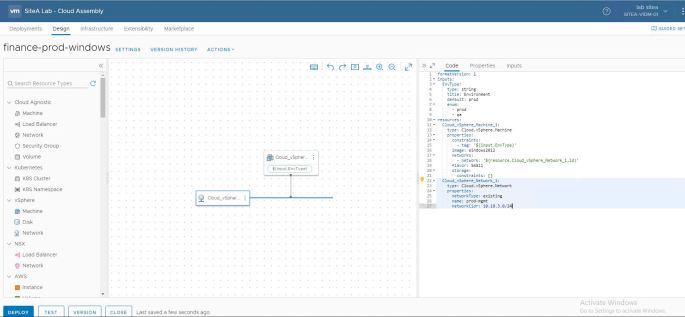
- You can sample code below to create blueprint. It will:
- Ask users to select if they want to deploy prod or qa machine
- According to environment selection, it will deploy VM on specific Cloud Zone created for prod and qa separately
formatVersion: 1
inputs:
  EnvType:
    type: string
    title: Environment
    default: prod
    enum:
      - prod
      - qa
resources:
  Cloud_vSphere_Machine_1:
    type: Cloud.vSphere.Machine
    properties:
      constraints:
        - tag: '${input.EnvType}'
      image: Windows2012
      networks:
        - network: '${resource.Cloud_vSphere_Network_1.id}'
      flavor: Small
      storage:
        constraints: []
  Cloud_vSphere_Network_1:
    type: Cloud.vSphere.Network
    properties:
      networkType: existing
      name: prod-mgmt
      networkCidr: xx.xx.x.0/24
- Click Test to check there are no syntax errors.
- Use Deploy option to Deploy VM from blueprint.
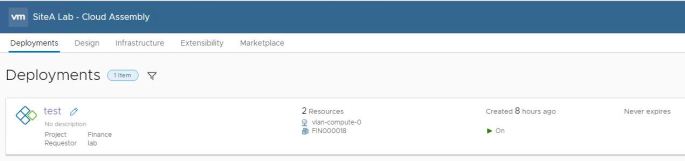
- You can monitor progress of deployment under Deployments menu.

- Click on Deployment name to monitor in depth progress.

- Going to vCenter, I can see my VM up and running.
- There is tag of costcenter is applied to VM as well which was created under project.

- A final successful deployment showing On state on vRealize Automation Deployments Page. Whoa!!!
Conclusion
Finally, some action. We have completed configuring cloud assembly. This is just initial configuration to get started with vRealize Automation. There are much more to explore in Cloud Assembly but that is for another day. Now, that we have live and running blueprint, we will use Service Broker to publish this blueprint to users. So, they can start provisioning machines as well. In next blog, will cover initial configuration for Service Broker.
Till then, Happy Learning…

Thank you, Vinay, for amazing blog series on vRA. I really appreciate taking time to put thoughts. I like the way you compare the product with the earlier version. This is really important for me, as I used this product in 6.x, and now I’m revising this product for a new Job. This has really helped me a lot. Thank you so much
LikeLike