In last blog, I had covered deployment of vRealize Automation 8.1. You can follow below link to look at deployment. Complete blog series links:
- vRealize Automation 8.1 Deployment – Step by Step
- vRealize Automation 8.1 Initial Configuration – Part 1
- vRealize Automation 8.1 Initial Configuration – Part 2
- vRealize Automation 8.1 Initial Configuration – Part 3
But, true fun begins after deployment while configuring vRealize Automation. There are multiple configuration steps, needs to be followed and sometime they can become overwhelming if coming from vRA 7.x environment. So, i have tried to create guide around initial configuration post deployment. It will cover configuration starting from Identity and Access Management, going to Cloud Assembly and then Service Broker for catalog. I will try to map key terms with their counterparts in vRA 7.x. Without further wait, let’s get started with part 1.
Overview
Architecture of vRealize Automation 8.1 has changed from 7.x. There are no more Windows IaaS Manager, IaaS web Servers. We now have 5 different services to manage vRealize Automation environment:
- Identity and Access Management – User, Group and Access Management.
- Cloud Assembly – Add and maintain your infrastructure, Create application cloud templates, and manage deployments.
- Service Broker – Provide the cloud templates and other templates to consumers in a catalog. Consumers can manage their deployments. Create and apply policies.
- Code Stream – Create and manage continuous integration and continuous delivery of software.
- vRealize Orchestrator – Design workflows that can turn anything into a service.
We will start with Identity and Access Management, integrate Active Directory, import users/groups from AD for granular access management, assign roles to users as per their role function.
Configuring Identity and Access Management
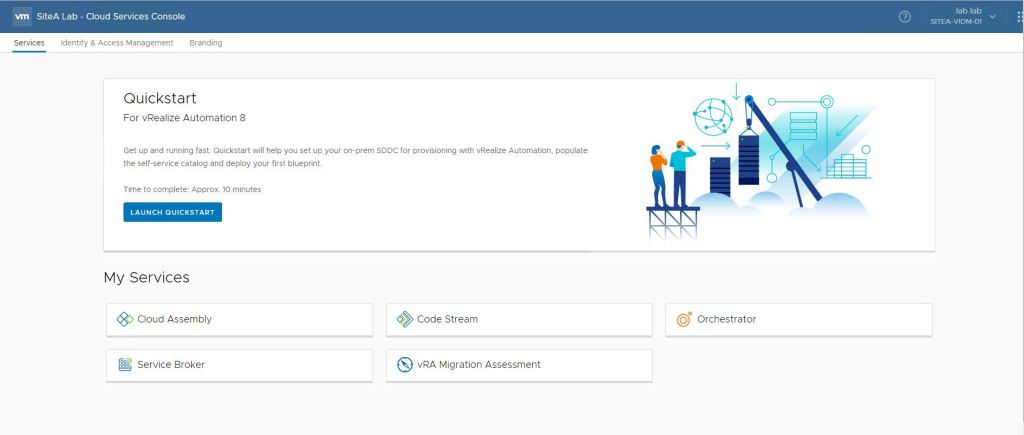
- Login into vRealize Automation system credentials which were specified during deployment.
- You will notice three tabs:
- Services: To configure vRA services
- Identity And Access Management: To manage Users/Groups
- Branding: To change company name, banner color etc. for vRA portal
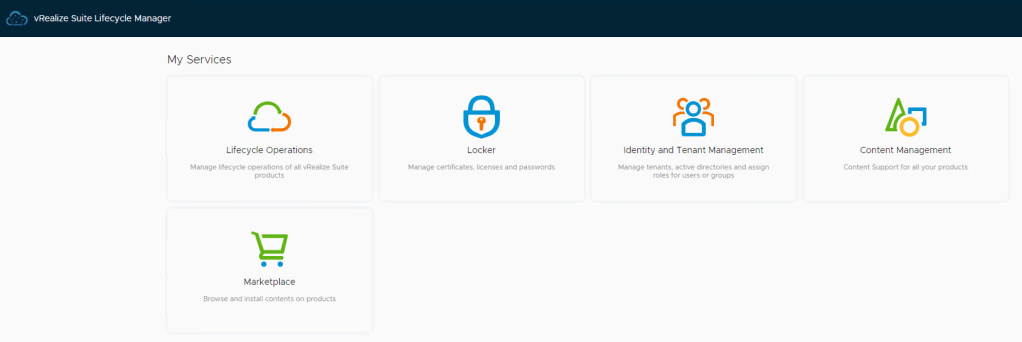
- In order to configure Active Directory, we need to go to vRLCM.
- You will notice three tabs:
- Go to vRealize Suite Lifecycle Manager and Click on Identity and Tenant Management.
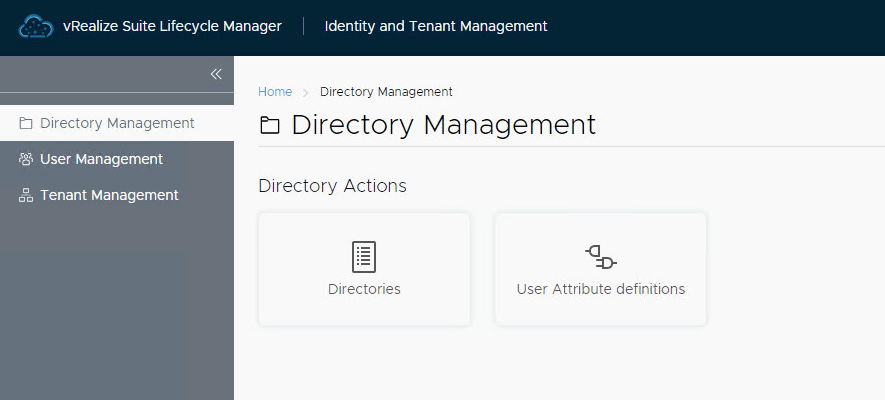
- Go to Directory Management > Directories/
- You can add directories in two ways
- Active Directory over LDAP – You configure AD as LDAP services by providing bind user and server for authentication
- Active Directory over IWA – If vIDM appliance is joined to AD, AD authentication can happen via machine account.
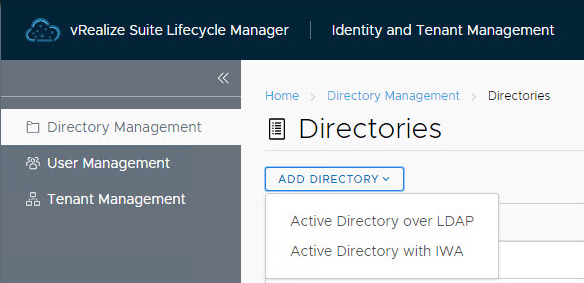
- I am using AD over LDAP method, so provide following details:
- Directory Name – Name to identify AD Directory in vIDM
- Select Connector – vIDM connector created to connect to Active Directory and sync users, default connector is created automatically during deployment
- Directory Search Attribute – AD attribute to identify user name, default is sAMAccountName
- Server Location – If DNS service records to locate AD domains
- Certificate – Require if AD requires STARTTLS encryption
- Bind User Details – User information to connect and sync users from AD
- Base DN – Base location in AD from where users search with begin
- Bind DN – complete distinguished name for bind user name
- Bind Password – Password for Bind user
- Click on Test Connection to ensure connection to AD is successful.

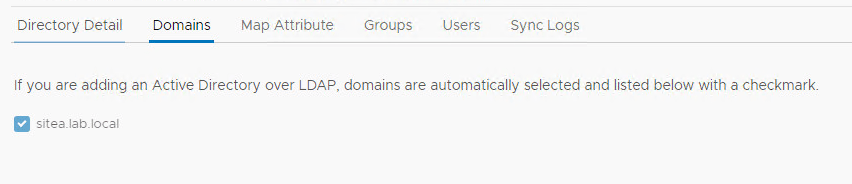
- Select the Active Directory domains, from where users needs to be synced.
- Select User attributes needs to be synced with vIDM from Active Directory. Please note that lastname, username, email and firstname are required parameters. If any user, doesn’t have these parameters set in AD, they will not be synced with vIDM.

- Provide the group DN to search and select groups from Active Directory. You can use Select All option to select all groups.

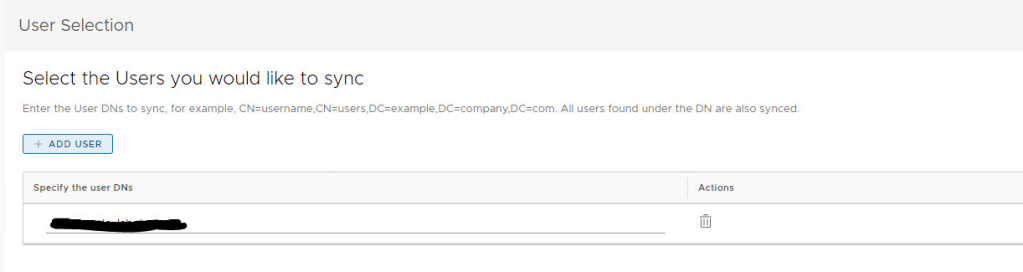
- Similarly, provide base DN for users to search and sync users from Active Directory to vIDM.
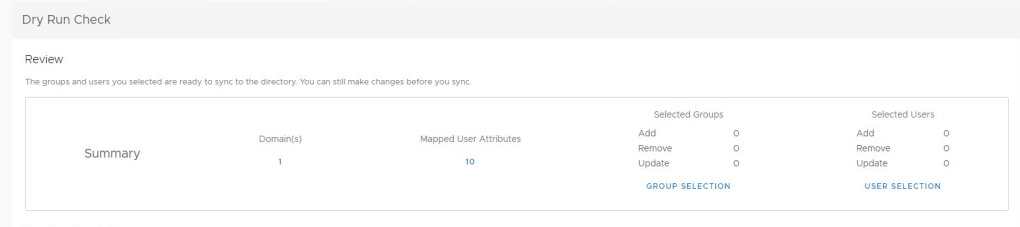
- Once on last step for Dry Run, it will provide you summary about how many users/group with be added to vIDM or removed from vIDM.
- If you are happy with results, click on Save and Sync and Active Directory will be added under Directory Management to assign roles to AD Users/Group in vRA.

- Go back to vRealize Automation Portal and Click on Identity and Access Management.
- Click on Enterprise Groups.
- Search for desired AD Group, you would like to add, in my case it was Domain Admins.
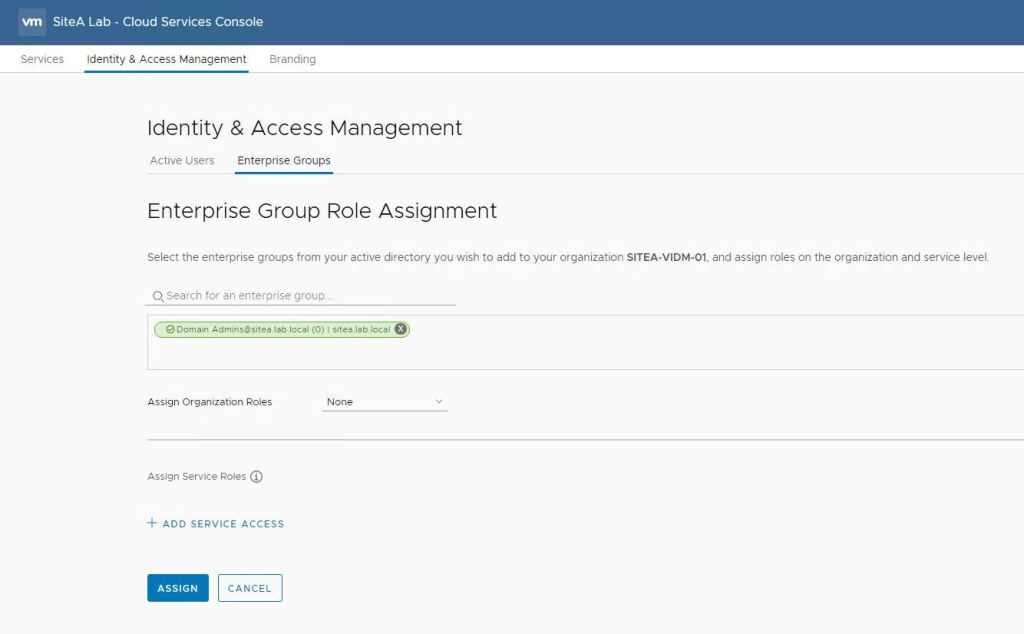
- Here, is the interesting part. There are two permissions in vRA 8.x.
- Organization Roles – These are Organization Wide roles and every user needs to be assign these roles. This will provide login access to users to vRA portal. If you didn’t assign Organization Roles, then login will not work.
- Service Roles – These are roles for specific services such as Service Broker, Cloud assembly etc.
- Assign the appropriate Organization Role:
- Member – Users will not have access to Identity and Access Management
- Owner – Users have will have access to Identity and Access Management and they can manage access for other users.

16. Assign the appropriate service roles and click Assign.

- At this point, log out from vRA portal. Once you back to login page, it will prompt you to select desired domain.

Conclusion
In this blog, we have covered how to configure Active Directory with vRealize Automation. This will allow us to import Users/Groups from Active Directory to vRA and assign them roles and access. This allows central management of Role based access control.
In next blog, I will cover how to manage infrastructure, integrate it with vRealize Automation, create template with help of Cloud Assembly.

Good reading youur post
LikeLike