Its been long busy with preparing for certifications and clearing them. I had been updating my labs with latest deployment for VCF, vRealize suite to prepare for certificates and made some deployment guides. Complete blog series links:
- vRealize Automation 8.1 Deployment – Step by Step
- vRealize Automation 8.1 Initial Configuration – Part 1
- vRealize Automation 8.1 Initial Configuration – Part 2
- vRealize Automation 8.1 Initial Configuration – Part 3
In this blog, we will look at Architecture of vRA 8.x, High Level Steps and detailed step by step clustered deployment of vRealize Automation 8.1. Also, we will cover issues encountered during deployment. In next blog, will cover initial configurations of vRealize Automation 8.1
Architecture
vRA architecture has been changed from previous 7.x deployments. Now, there is no separate deployment of IaaS Manager or Web Server, SQL Database, Agents VMs etc. Below three components are now integral part of vRealize automation deployment:
- vRealize Lifecycle Manager
- VMware Identity Manager
- vRealize Automation
Similar to 7.x deployments, there is either standard deployment or clustered deployment to support small or large environments accordingly. Let’s take a brief look at these deployments:
Small Deployment
Under this deployment, only single instance of vRealize Life cycle Manager, Identity Manager and Automation appliance is deployed. There is no need for load balancer VIPs.

Large Deployment
Under this deployment, high availability of environment is achieved through multiple instances of vRealize Identity Manager and vRealize Automation Appliance behind load balancer VIPs.

Below components are required for large deployment:
- Identity Manager Appliance Load Balanced VIP
- vRealize Automation Appliance Load Balanced VIP
- vRealize Lifecycle Manager Appliance
- vRealize Identity Manager Appliance x 3
- vRealize Automation Appliance x 3
Clustered or Large Deployment Guide
vRealize Automation 8.x uses Easy Installer method to perform automated deployment of vRSLCM, vIDM and vRA. The vRealize Easy Installer provides you with a functionality to install vRealize Automation 8.1 with minimum steps. The installer provides you with minimal or a clustered deployment options before you start your vRealize Automation configuration. Manual installation of vRealize Automation through OVA or ISO is not supported.
Pre-requisites
- For clustered deployments, Load Balancer is a must. If using TCP based load balancer, ensure SSL passthrough is selected during deployment.
- DNS resolution should be working fine. All A and PTR records must be created and should resolve.
- NTP should be in sync. Better to use NTP server, but ensure there is no time drift between ESXi hosts if using host based time sync.
High Level Steps
- Download Easy Installer ISO and mount it.
- Deploy vRealize Life Cycle Manager
- Deploy vRealize Identity Manager or Import it.
- Deploy vRealize Automation environment from vRLCM.
Detailed Steps
- Download Easy Installer ISO and mount it as virtual CD/DVD. Go to desired OS folder and run installer.exe. E.g. In my case it was Windows machine, so i went to F:\vrlcm-ui-installer\win32\installer.exe

- Click Install to Start New Deployment or Migrate to migrate from earlier versions of vRrealize Automation to 8.1
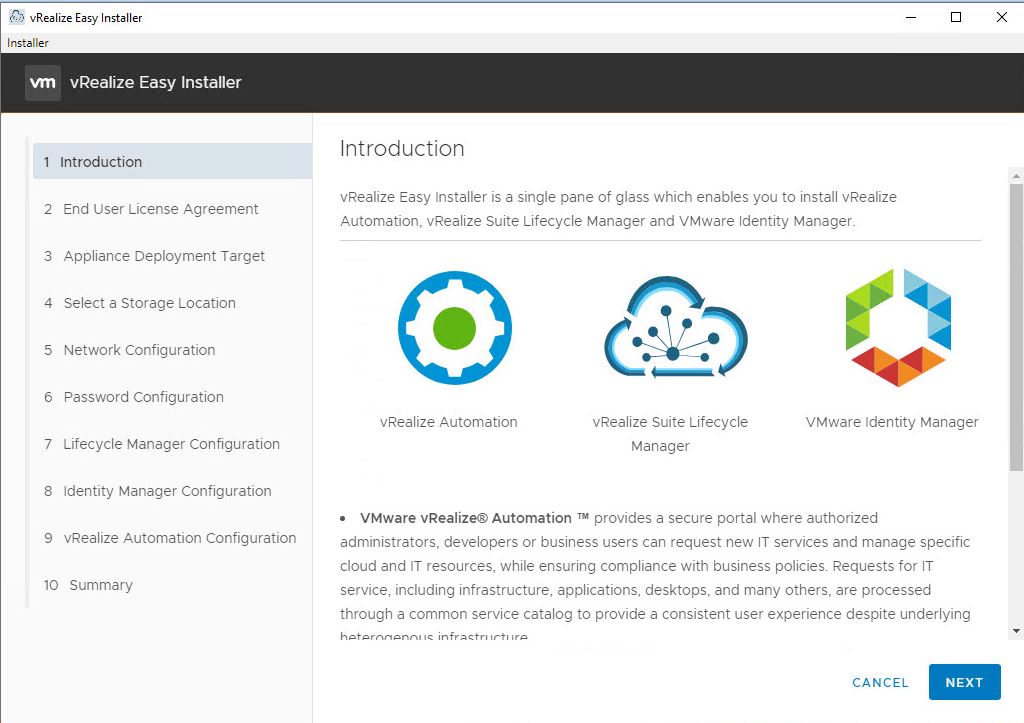
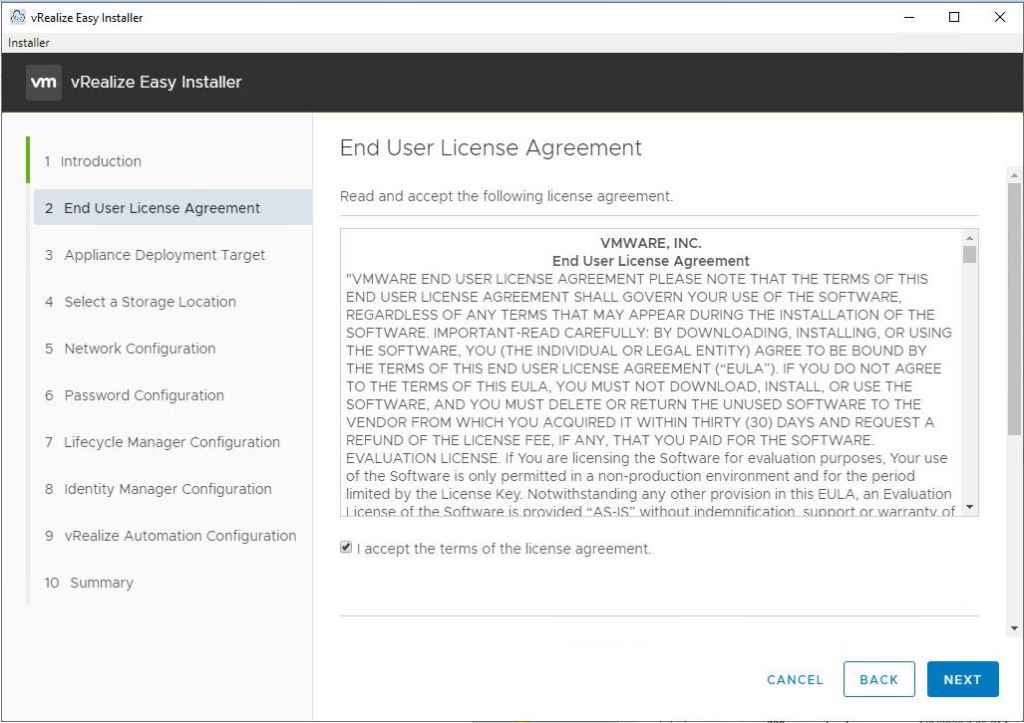
- Accept EULA to proceed ahead.
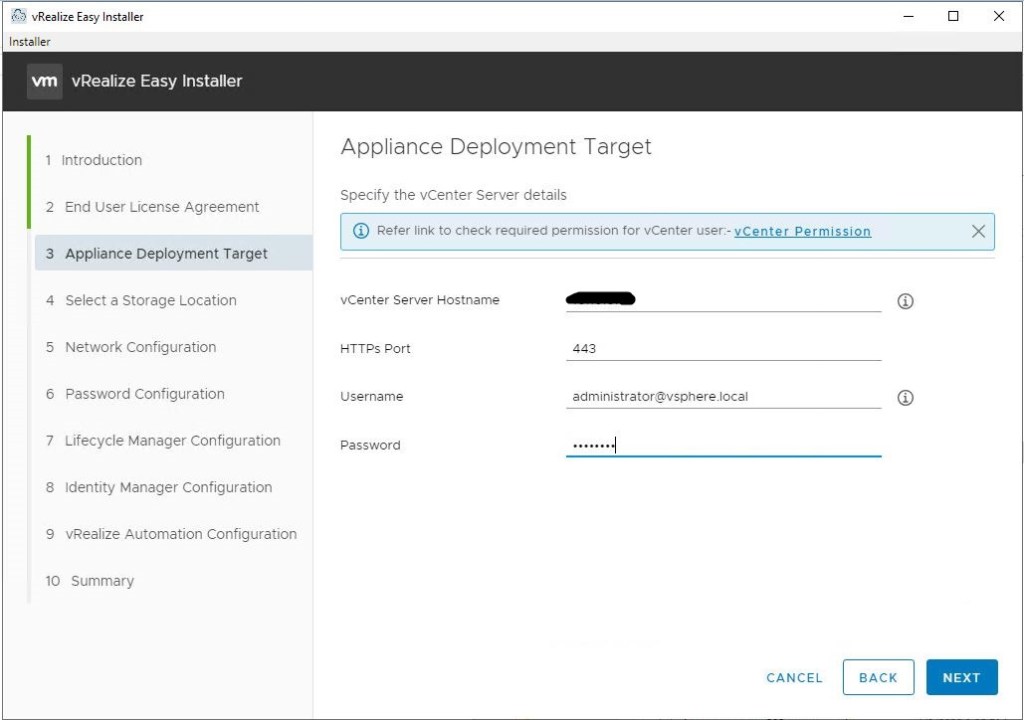
- Provide target details where vRSLCM, vIDM and vRA appliances will be deployed. These details include:
- vCenter server FQDN
- Port – default 443, change if using custom port
- Username
- Password
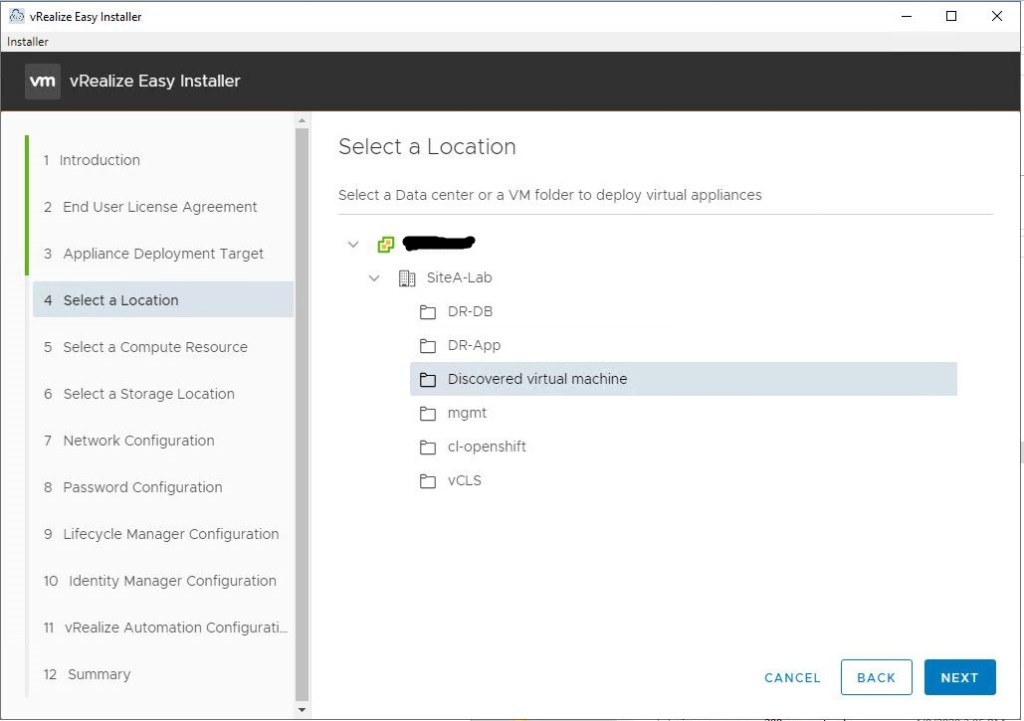
- Select Target VM folder location to place appliance VMs.
- Select Target cluster to provide compute resources to VMs.

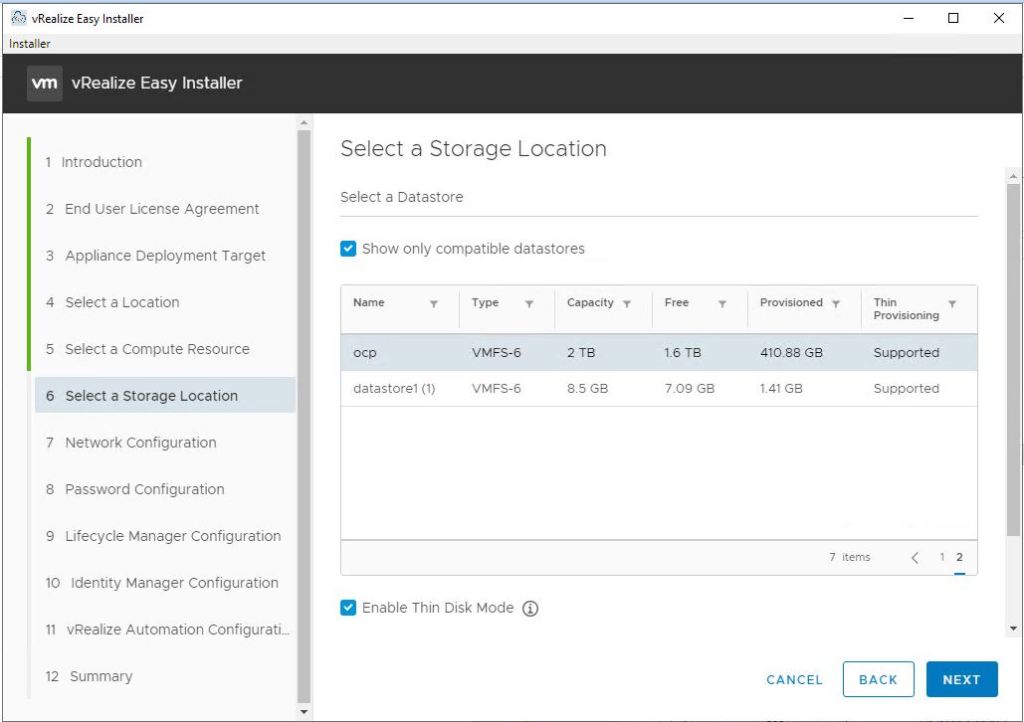
- Select target datastore to provide storage for appliance VMs.
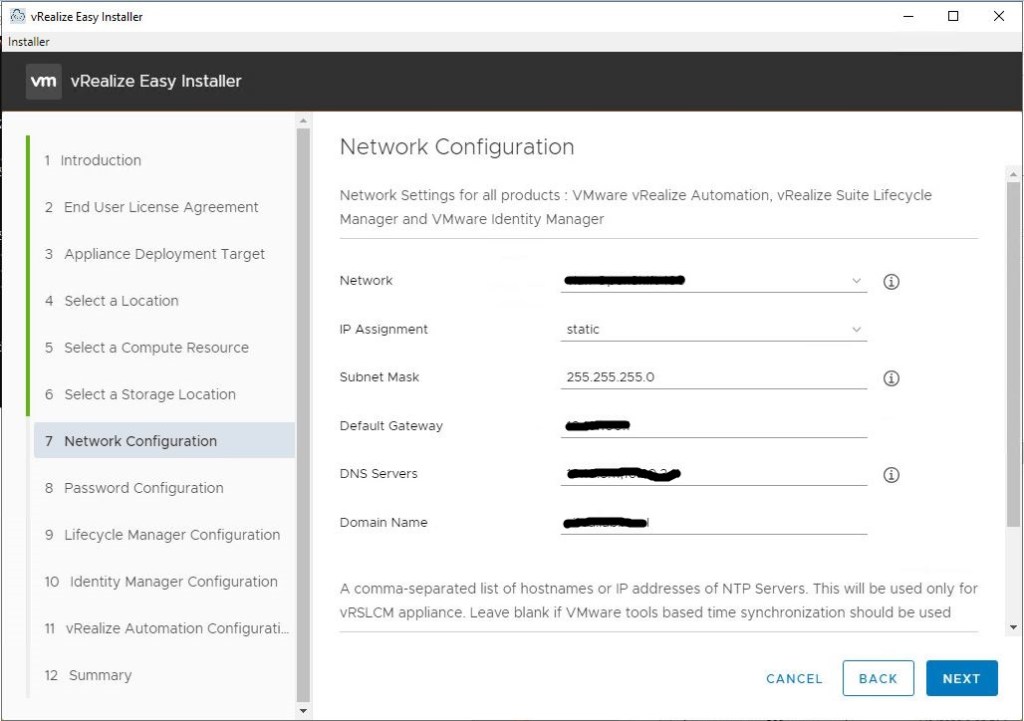
- At this step, provide common network details which will be used for all three types of appliances which are vRSLCM, vIDM, vRA.
- Network – Select Distributed Port Group or Overlay Network for VMs
- IP Assignment – Either Static or DHCP, if using DHCP ensure reservations are created to provide static IPs
- Subnet Mask – Provide subnet details
- Default Gateway – Default gateway for VMs to talk to network
- DNS Server – Ensure DNS server provided here are able to resolve both A and PTR records created for environment
- Domain Name – base domain name in which A and PTR records are created
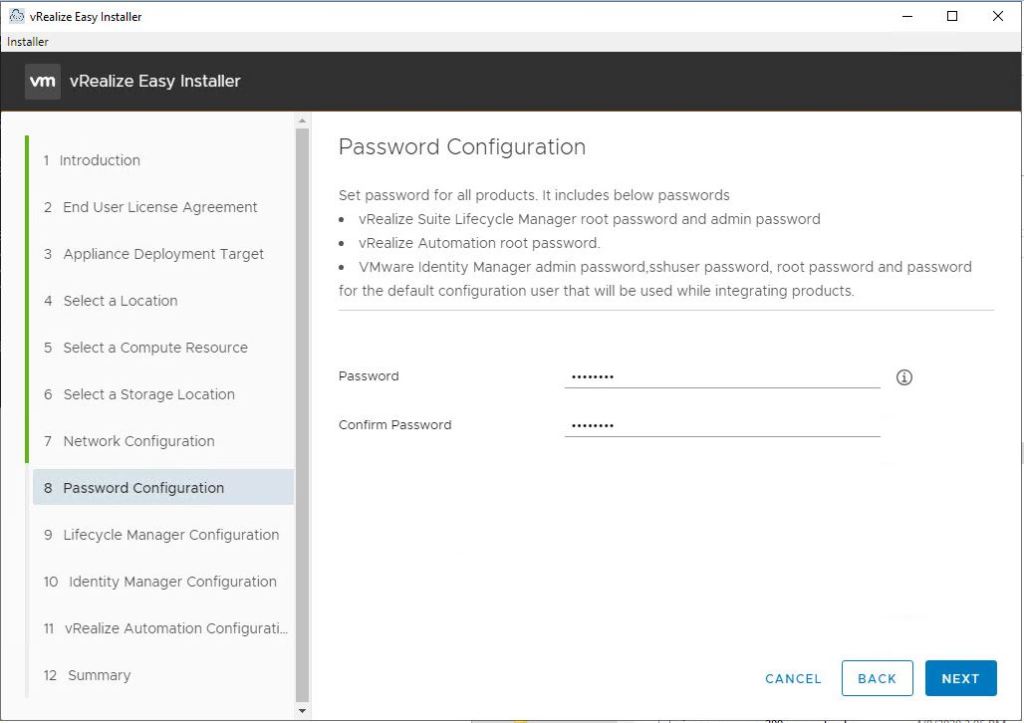
- Provide default password which will be used by Lifecycle Manager for installations.
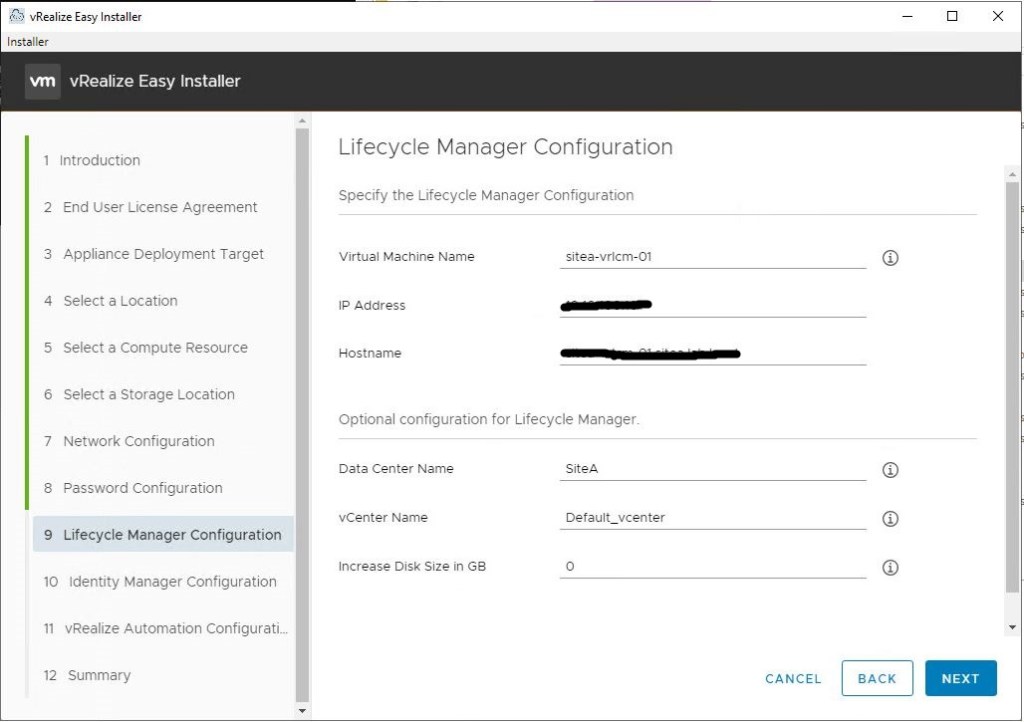
- Provide IP Configuration details for vRealize Life Cycle Manager. Also, you can set DataCenter Name for your deployments in vRLCM else default_datacenter name will be used. Also, select how vRLCM will sync time, either with NTP server or ESXi host.
- Similarly, configure IP settings for vIDM. Few points:
- You can skip installation of vIDM here, if you want to deploy clustered vIDM appliances. vRSLCM by default deploy single vIDM appliance.
- If your clustered vIDM environment is ready, you can import same to vRSLCM using easy installer.
- Also, note your default configuration admin, this will be used to configure vIDM with vRA.

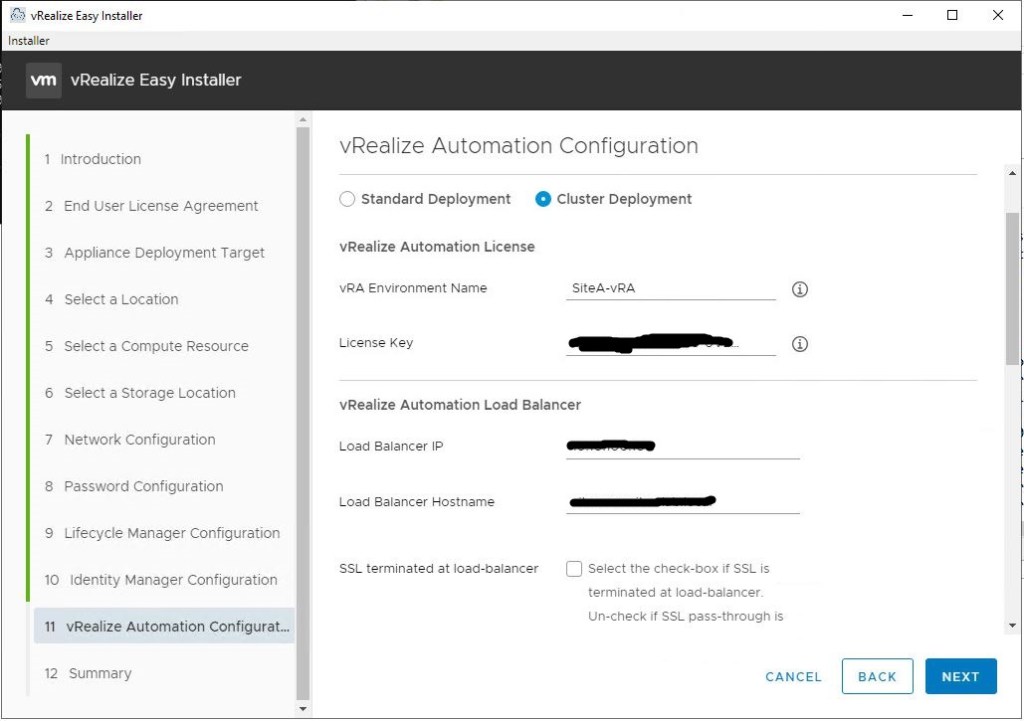
- Similarly, provide IP Configuration details for vRA environment. Again couple of things to remember:
- If you need to use custom CA Certificates, skip vRA deployment using easy installer, use vRSLCM later on to deploy vRA with custom certificates or use vRSLCM to rotate certificates
- Select either standard or cluster deployment
- If cluster deployment is selected, then it will ask for Load Balancer VIP, carefully look at option SSL Terminated at Load Balancer
- Tick this check box, if using Layer 7 load balancer
- Untick this check box, if using Layer 4 TCP load balancer
- Incorrectly, selecting this can fail your deployment.
- Review, your configuration and press Submit to start deployment.

- Review installation process of vRA deployment. In high level:
- It will deploy vRSLCM VM in vCenter
- Power it up.
- Wait for vRLCM services to come online.
- Move OVA files from desktop to vRSLCM for vIDM and vRA appliances.
- Deploy vIDM and vRA based on previous inputs.

- You can try to look at progress in real time by going to
- https://<FQDN-of-vRSLCM>/vrlcm
- It will show a nice window with current progress.

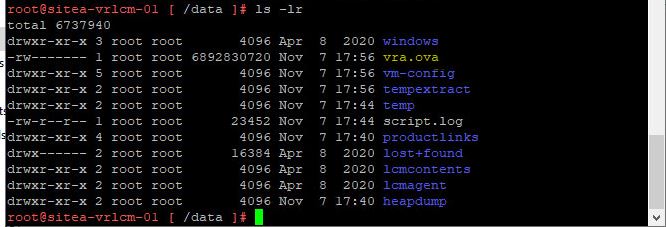
- Once, vRLCM is deployed, you can login into putty to check on progress of OVA files copying.
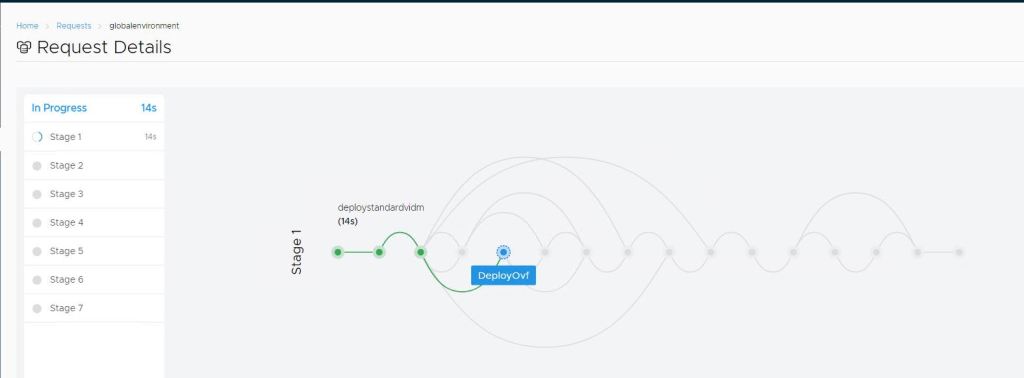
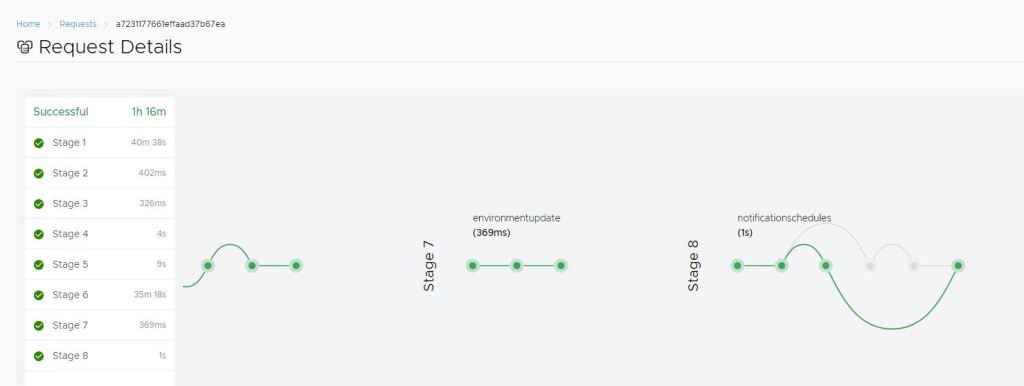
- After vRLCM is powered up, login into it. Go to requests. You will be able to see different environment creation in progress.
- Globalenvironment – vIDM deployment
- vRA Environment Name – vRA deployment

- It will either deploy OVF or import existing vIDM environment as per inputs provided during setup.
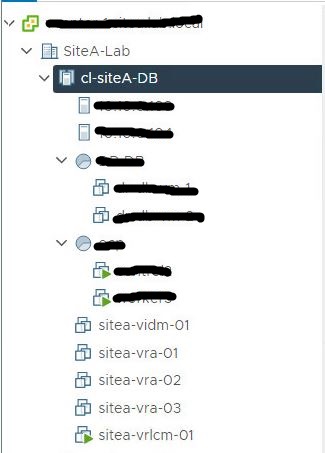
- If you go to vCenter server, you can monitor progress of deployment of VMs.
- Next stage to deploy and install vRA.

- Again, vRA deployment progress can be monitor through vRLCM by going to requests tab. Also, if deployment got failed in between, you can retry it from within vRLCM.

- It will show all stages completed post successful deployment of vRA.
- And our shiny new vRA deployment is up and running. This conclude our deployment part.
Issues Encountered
Deployment getting failed at client-secrets failed.
Issue was due to non functional DNS server present in vRA appliances. Ensure, to use only DNS servers which can properly resolve DNS records.
ABX-Service Failed to start
Issue was due to incorrect selection of Load Balacer SSL Termination. If Layer 4 TCP Load Balancer is used, ensure SSL Pass through is used.
You can below commands to check on status of services and logs:
kubectl get pods -n prelude
kubectl get deployments -n prelude
kubectl logs -n prelude <podname>
Reference Links:
https://kb.vmware.com/s/article/78566
https://kb.vmware.com/s/article/79609
Conclusion
This marks the ending for this blog. VMware has made deployment of vRA very easy. Using Easy Installer it can be further completed in minimal steps. In next blog, will cover the initial configuration of vRealize Automation and how it is different from vRealize Automation 7.x in terms of configurations.

Awesome!
LikeLiked by 1 person