In previous blogs, we have seen how to deploy vRealize Automation 8.1 and how to configure Active Directory to provide access to users/group on vRealize Automation 8.1 as well as integrating infrastructure and creating blueprint. You can follow below links to visit previous blogs:
- vRealize Automation 8.1 Deployment – Step by Step
- vRealize Automation 8.1 Initial Configuration – Part 1
- vRealize Automation 8.1 Initial Configuration – Part 2
- vRealize Automation 8.1 Initial Configuration – Part 3
In this blog, I will cover how to configure Service Broker and provide catalog Items to users for their consumption. So, let’s get started.
CONFIGURING service broker
- Login into vRealize Automation and navigate to Service Broker.

- The requirements and process for setting up your vRealize Automation Service Broker catalog depends on the content that you are providing to your users. Basic workflow to add vRealize Automation Cloud Assembly blueprints to the vRealize Automation Service Broker catalog is as follows:

- First we need to add Content Sources, to import Cloud Assembly blueprints. So, Go to Content & Policies > Content Sources and Click on New.

- There are multiple sources to import blueprints from such as AWS Cloudformation, Code Stream or vRO for XaaS. Select Cloud Assembly Blueprint.

- Give it a Name and Select Project created earlier to import blueprints from. Click Validate and upon successful validation, Click on Create & Import.

- Cloud Assembly sources should be configured now. Similarly, you can create more sources pointing to different Project under Cloud Assembly.

- Once we have Content Sources configured, we enable Content Sharing and share item with Users of Project to enable deployments. Select the project that includes the users who should be able to deploy the blueprints and Click Add Items
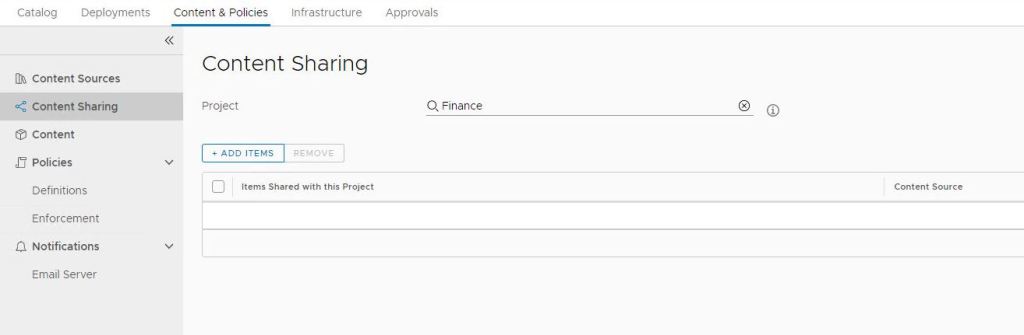
- Select the blueprint.

- Now Users of Finance Project will be able to deploy blueprint from source Source-Finance.

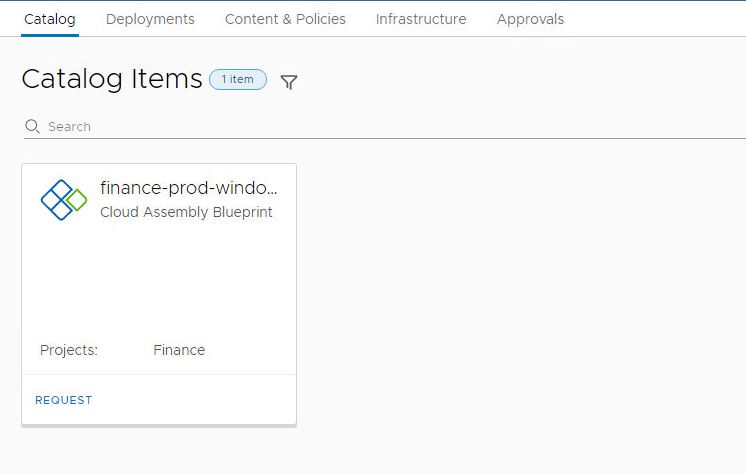
- Navigate to Catalog. You should be able to see catalog item which you have shared earlier with users.
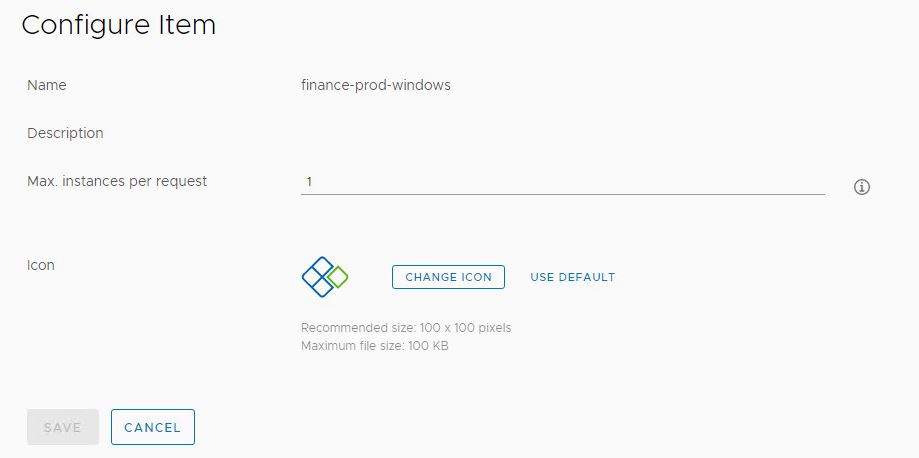
- You can customize Form or Item attributes such as icons etc. Go to Content & Sources > Content. Click on three dots and it will present you desired options.

- If you had clicked on Configure Item, it will provide options to change Icon and the maximum number of instances that can be deployed per request.
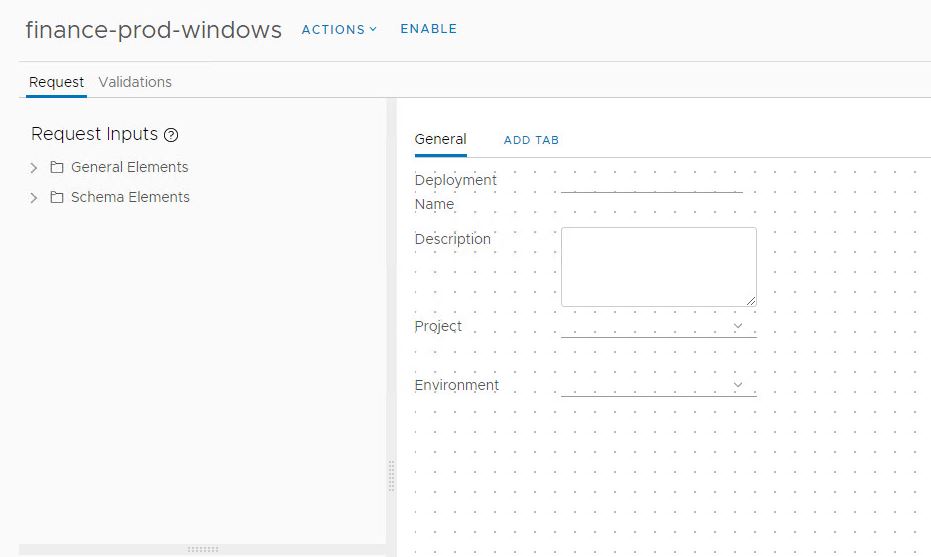
- On similar basis, you can customize Input Form.
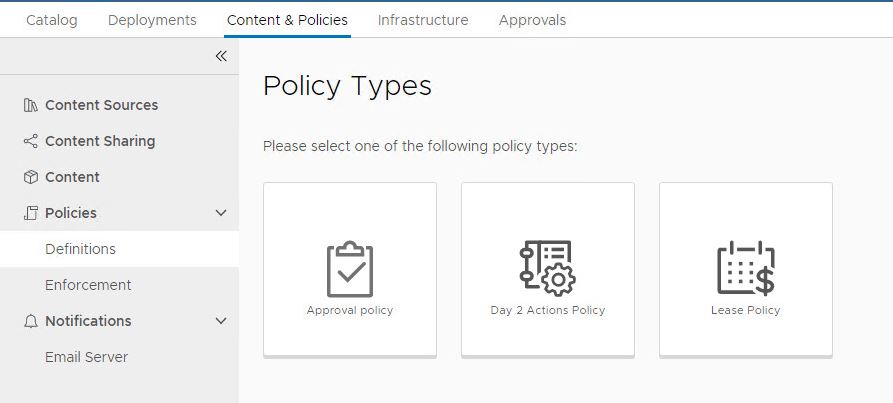
- From Service Broker itself, you can define policies. There are three type of policies:
- Approval Policies – These provide level of governance that you can add to exercise control over deployment and day 2 action requests before they are run.
- Day 2 Action Policy – These control what changes users can make to deployments and their component resources
- Lease Policy – These control the amount of time that a deployment is available to users.
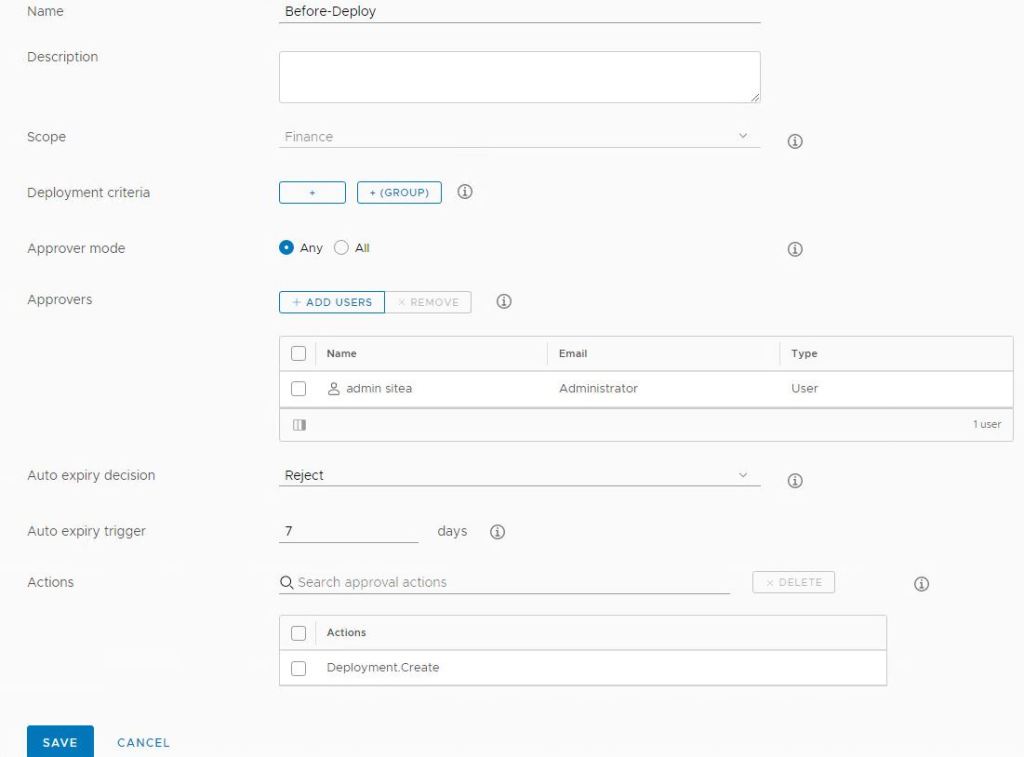
- Below screenshot shows a sample Approval Policy. This policy define that before any deployment is created, it needs to be approved Approver admin sitea. If approver do not take any actions then it will be auto Rejected.
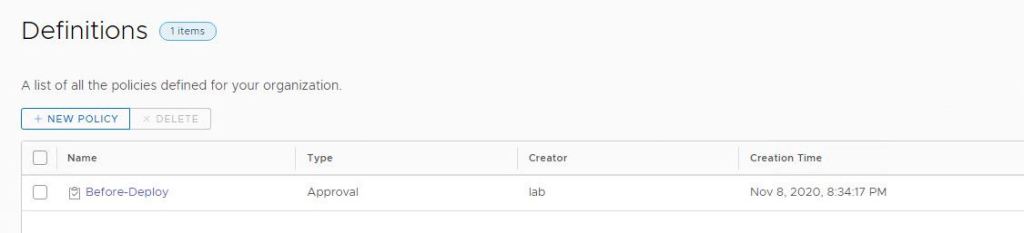
- A completed and enabled Approval Policy.
- You can configure Email Server to send notifications to appropriate users by email using SMTP.

- So, we have configured Service Broker. Lets start testing configuration by deploying a catalog item.

- As we have applied Approval policy to wait for Approval before deployment, hence vRA is waiting for Approver to approve request.

- As a approver, I have received request for a deployment test-approval. I can either approve it or reject it.

- Rejecting the request will make the deployment go fail.
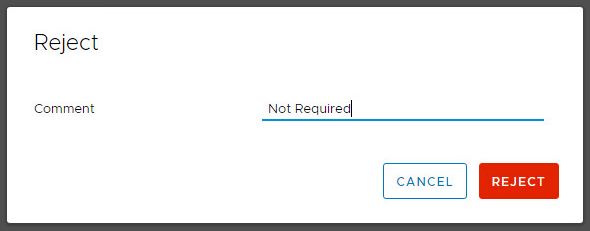
- User will see that request for deployment is rejected along-with comments provided by approver.

Conclusion
This concludes the 4 Part series of deployment and initial configuration of vRealize Automation. But this is not the end and we have covered only surface of vRealize Automation 8.x. There are much more extensibility and automation which can be achieved with vRA specific to use cases. Let me know in comments, if you would like me to cover any specific use case and would try my best to cover it.
Till then happy learning !!!

Thanks for the excellent blogpost and knowledge sharing.
Couple of questions:
We are planning to deploy clustered vRA 8.x, request you to address these doubts:
1. Do we need to install Proxy agents for vCenter endpoints like how we were doing for vRA 7.x.
2. Please let me know the postgres size limitation incase we scale the environment with additional nodes – 222 GB is given for postgres db for each node. For bigger environment like 20000 deployments, how much should be the db limit.
3. After 3 node cluster, if we add additional node – how the scalability configuration maximum limits are impacted.
Thanks in advance.
LikeLike
1. No, you do not need Proxy Agents like v7.x. In v8.x, there are 3 vRA Appliance which will be deployed in large configuration. You need vIDM now, so for large environment, it will be 3 vIDM appliances as well.
2. Please refer link – “https://docs.vmware.com/en/vRealize-Automation/8.2/reference-architecture/GUID-9DD443EA-0F7A-43B3-AD0A-8370B56109BE.html” for config maximums, it should be covered
3. vRA 8.x is a three node architecture for maximum scalability.
LikeLike